Wednesday, August 24, 2011

Dinner on the Fly: White Peach and Beet Salad


Sometimes I am not a good cook.  It's true.  Sometimes I don't even want to turn on my stove.  But I will for the mere necessity of eating dinner during the week.  For a few weeks I will spiral downward into a vortex of mediocre dinners.  To make it worse, my kitchen is almost never clean.  Truth is I just don't like takeout food.  But somehow there needs to be a compromise between making a perfect dinner, following recipes and being faithful to my trusted techniques, and having Styrofoam boxes of greasy food delivered to my door.  I am trying to convince myself that certain recipes are so little work that there is no difference betwwen throwing one together and ordering takeout.  Although that isn't always true I am trying to get as close to that statement as a goal as possible.  Maybe even eating something that is sure to keep my kitchen clean.  I want what I want, right?  And who says I can't have everything?

Then sometimes dinner comes together. A new recipe comes from just eyeing a combination of goodies in the fridge. Maybe it's the season.  Call it an accident.  A stroke of luck even.  Whatever.  I barely turned my oven on for this one.  I did but barely.

I had peaches. I had beets.  At some point I new that I had crostini with a smear of goat cheese and a slice of nectarine.  I am not sure where but it was delicious.  Beet and goat cheese salad is one of my classic go to recipes.  See, it was all coming together.

On this day the beets and the peaches were equally sweet, thanks to our biweekly CSA share.  Still, I couldn't help but add a drizzle of sweet balsamic vinegar.  It's like putting sugar on your strawberries in the morning.  You don't need it but it is so good.  The added complexity of a tart contrast is what finishes the salad, in this case a little lemon and a dollop of goat cheese.


White Peach and Beet salad with Goat Cheese
  • one bunch beets red or white with greens attached,
  • 2 to 3 peaches (white or yellow)
  • 10 basil leaves torn
  • approx. 1 1/2  tablespoons of olive oil
  • juice of half a lemon
  • approx. 1 tablespoon sweet balsamic vinegar
  • salt
  • pepper
  • goat cheese (like chevre) for serving
Preheat your oven to 400 degrees.  Cut your beets into cubes and toss with salt and a drizzle of olive oil.  Roast in a baking dish until tender.  While the beets are in the oven mix your oil, vinegar and lemon, mixing the oil in last ad slowly.  Allow beets to cool for 10 minutes then toss all your ingredients.  Serve with a dollop of goat cheese.

Wednesday, August 17, 2011

Sweet Spot: Affogato with Homemade Vanilla Ice Cream


I am a girl of simple tastes.  Believe me.  I sound fancy with my duck confit carbonara, mango chili pops and my trips to fancy food markets but at the end of the day, I am all about vanilla.

I think that Nick and I have agreed that this has been our favorite dessert of the summer.  Affogato literally means drowned in Italian and it is what an Italian does to vanilla ice cream once they have poured espresso over it.  Oh how I adore the poetic language Italians have for food!  Really, I could bore you at a dinner party.  But I digress.  To make an affogato you take a scoop of very good, very cold vanilla ice cream and pour a shot freshly made, very good and very hot espresso over it.  The ice cream melts just slightly so some of it pools with the espresso. If you could buy this at a stand you may never order another Starbucks Frappicino again.  In fact, I hope you don't.  (Sorry Starbucks, I respect the health insurance that you give your workers but not your monopolizing and over sweetening our coffee tastes.)

Home Made Vanilla Ice Cream

A wise cook told me recently that if you are preparing something that involves a kitchen gadget you should look at the recipes that come with gadget along with its manuel.  The manufacturer wants you to be satisfied with their product so they are going to give you the proportions of ingredients that will get you the best results.  This rang true for my ice cream maker.  I use a simple Donvier freezer bowl maker (click here to see types of ice cream makers) one that my mom had when we were kids.  This is the ratio that works best for mine but if you have a different ice cream maker it may vary. 

For one pint:
  • 1 egg
  • 1/3 cup sugar
  • 3/4 cup milk
  • 3/4 cup cream
  • 1 tsp vanilla
In an electric mixer, beat the eggs and sugar first.  Then add the cream, milk and vanilla.  Then follow the instructions according to your ice cream maker.


Monday, August 8, 2011

Foodie Gifts: Fudge Brownie Recipe in a Jar


This isn't the first time I gave a foodie gift in a jar.  Once when asked of what she'd like for Christmas, an aunt of mine said that she always liked "consumables."  I personally could not agree more but you could chalk that up to our small living space.  Food can make a great gift and it is inarguable a consumable.

The first year I gave gifts of tasty goodies in a jar was Christmas 2008.  Like many others, it was an economically tight year for us and I was re-evaluating our culture of consumerism.  I thought a lot about all that had been bought and wasted in our lives and our society.  I should mention also at this time Nick and I had just been married with yours truly as both bride and wedding planner.  Which means we had a ton of leftover stuff from having bought everything we needed for the wedding a'la`carte.  Things like card stock from home made invitations to silk flowers to alcohol and cocktail swizzle sticks.  Four months later we had more vodka than we reasonable could (or should) consume.  I started giving gifts of flavor infused vodka for the holidays.  Than later pickles from the vegetables from our CSA share.  I would like to think I am getting better at which kind of tasty jar is right for which kind of foodie friend.

On to the present.  After all, there are no cranberry vodkas or pickled green beans in this post.  But this year's news of my becoming an aunt has set my creative gift making gears in motion.  Making things (food or other) has always been a way in which I show affection.  So for my sister-in-law, Stacie's baby shower, I found those old party planning shoes in the back of the closet.  The ones I wore when I decided to make my own invitations, table cards and wedding favors.  The result?  Fudge Brownie mix in a jar as favors for all the guests.  I think most of us there had a fond memory of baking something sweet with a parent or grandparent.  I hoped this helped keep that tradition going.  If you don't want to make thirty they also make a nice gift for one.

Fudge Brownie Mix in a Jar


1 1/4 cup all purpose flour
1 1/4 cup sugar
1 teaspoon baking powder
1 teaspoon salt
2/3 cup cocoa
1/2 cup chocolate chips

Affix these directions to your jar:

1.  Preheat the oven to 350 degrees F.
Grease and flour a 9x13inch baking pan.

2.  Empty the jar of brownie mix into a large mixing bowl,
and stir to blend. In a small mixing bowl, combine 3/4 cup
melted and cooled butter with 4 eggs, then add mixture to
brownie mix. Mix all ingredients thoroughly. Spread batter
evenly into greased baking pan.

3.  Bake for 25 to 30 minutes in preheated oven.
Cool completely in pan before cutting into squares.


Thursday, August 4, 2011

Inspiration Outing #4: Guido's Burritos in Ocean City MD

Food obsessions run in my family.  Being meticulous about good ingredients and creative with flavor combinations are inclinations that live under our skin.  I have already featured a few family members on this blog and the list will probably keep growing.


Ocean City, Maryland was one of our family vacation spots growing up. My aunt and uncle owned a small hotel on the boardwalk (now a super-sized hotel with two pools and a restaurant, all due to some incredible business intuition, see Tidelands Caribbean Hotel) and we were always welcome for a visit.  My cousins kept up the tradition of family businesses on the boardwalk.  Guidos Burritos is owned by two of my cousins, Rocco Difillipo and Danny Robinson.  Let me share our delicious meal and the fabulous time we had.


Guido's is such a breath of fresh air on this strip.  I love the beach, the sun and open air, strolls on the boardwalk but not the fried food and candy that is sold everywhere.  Really the last thing that is appealing to me under the hot sun  I heavy, greasy fried food and sugary snacks.  I can't tell you how refreshing it is to come of the beach and go to a sit down restaurant with food that uses fresh ingredients and good drinks, the like of which are seen below.


Guido's serves local, craft beers as well as some pretty tasty sangria and margheritas.


Here's the menu breakdown:  Burritos and Not Burritos.  If you are choosing a burrito (which I recommend), your choices are take on themes of traditional flavor combinations and americana favorites.  For example the "Black and Blue Burrito" that features skirt steak and blue cheese.  I had a burrito that featured Maryland crabmeat and sweet corn seasoned with Old Bay.  Dare I admit that I dug my fork into everyone else's plate around the table?  That being said, another favorite was the "Blacken Shrimp Burrito"  that has a refreshing pairing of cilantro and pineapple.  


Shown are the appetizers we ordered.  The "Salsa Trio" consisted of a traditional red salsa, spicy mango salsa and a green tomatillo salsa.   Guacamole was akin to Rosa Mexicano in NY  (which is actually the only thing I would order there.)  


At the head of the table is Danny joining us for lunch.  He is like a proud papa talking about this place.  Owning your own business is something I imagine as an ultimate creation, and here we are happily celebrating it.


Monday, July 25, 2011

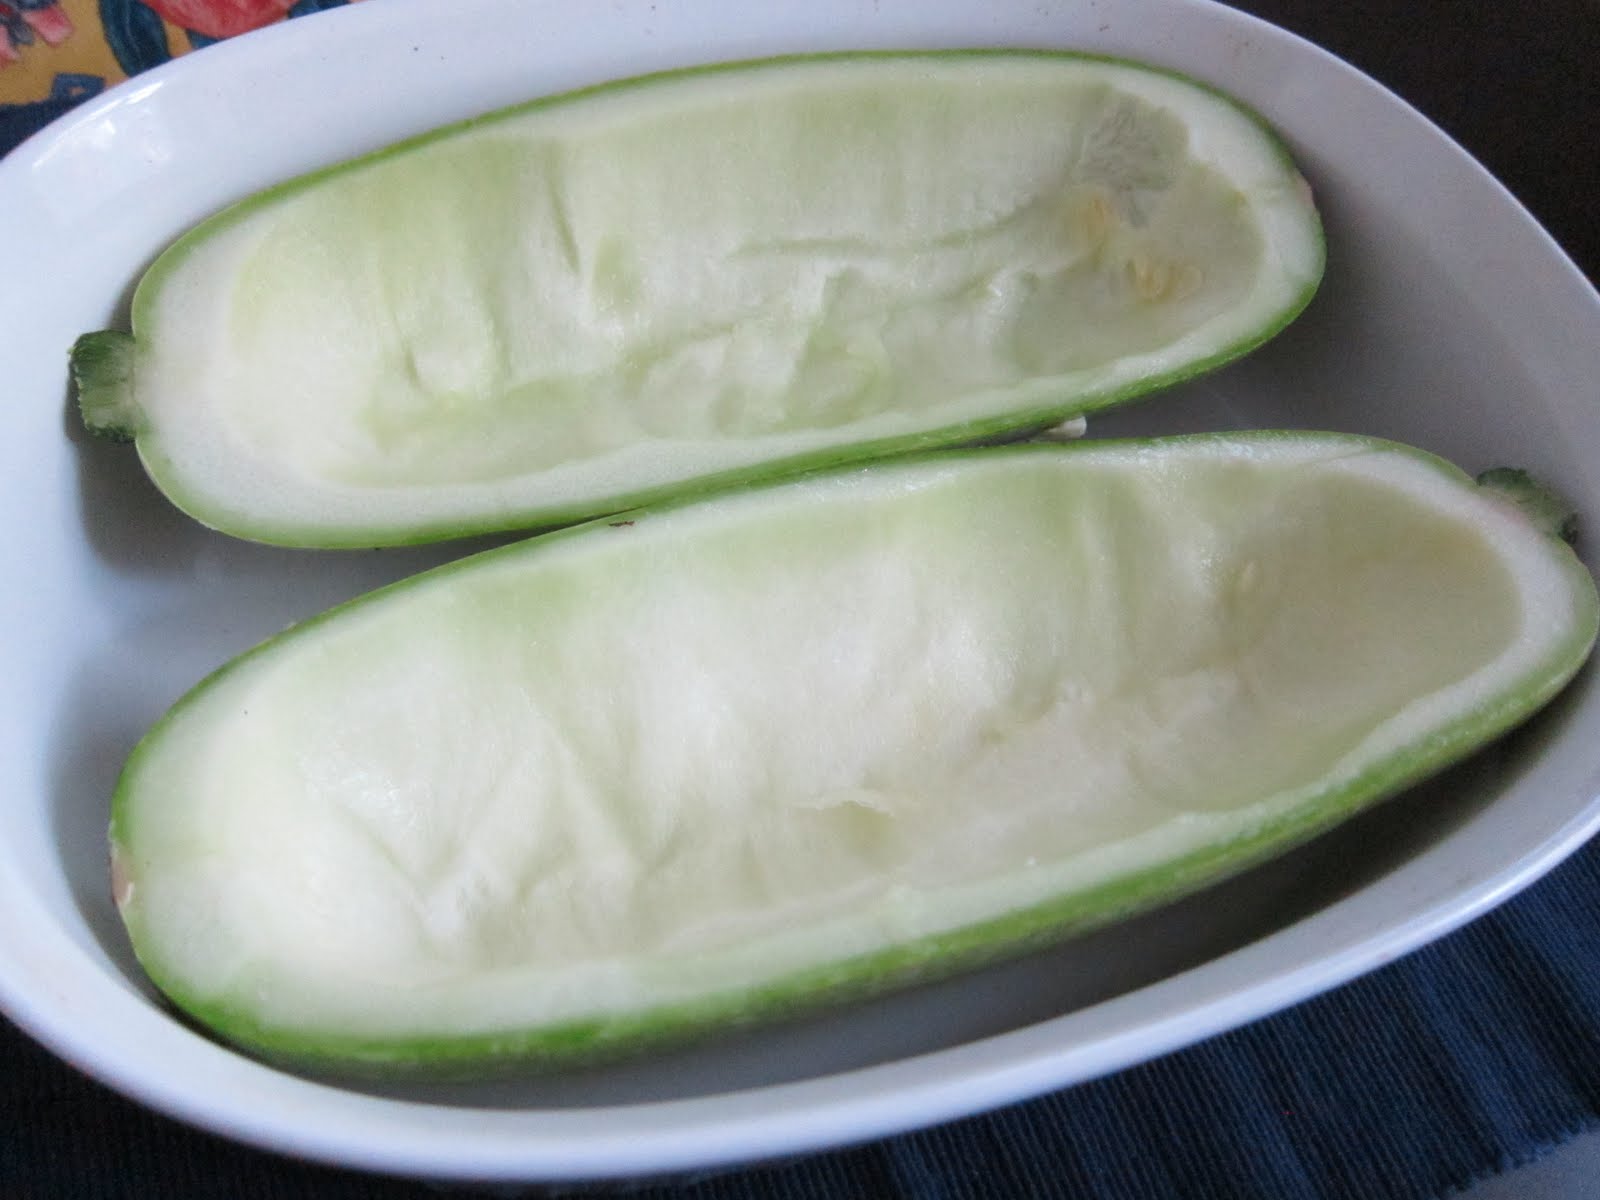
Dinner on the Fly: Stuffed Zucchini Boats

Zucchini here, zucchini there, zucchini, zucchini everywhere. Our local CSA is in full swing and zucchini season it is.  How many ways can I make this stuff?  What to do when your zucchini is the size of a small watermelon? Well, summer isn't all brisket and hamburgers now, is it?  I still fairly new at stuffing vegetables but this recipe is easy.  I think it is worth experimenting with, use different cheeses and herbs, maybe add a meat for something a little more filling.

Stuffed Zucchini Boats

1 large 2 small zucchini 
2 garlic cloves minced
1 onion, chopped
3 plum tomatoes, chopped
A handful of basil leaves chopped or torn
Juice of one lemon
1 cup cooked rice
1/4 to 1/2 pound feta cheese
1 tablespoon maras biberi (Turkish red pepper)
1/4 cup pitted black sundried olives
light sprinkling of sea salt
Drizzle of olive oil

Preheat your oven to 475 degrees.   Scoop out the insides of the zucchini with a spoon or melon baller. Drizzle a little olive oil inside the holllowed out zucchini.  Chop and put aside in a large bowl.  Add all remaining ingredients to the bowl with chopped zucchini and toss.  Drizzle a little more olive oil in the mixture and bake until tender.  About 35 to 45 minutes.


Saturday, July 16, 2011

Community Table: Nick's Barbecue Brisket

I have never seen a man seem so perfectly in his element than my husband, Nick, grilling barbecue brisket.   Maybe grilling is the wrong word.  It is an all day barbecue, with a beer in hand.  Over the years I will admit that I have monopolized the kitchen. But on brisket day I surrender my kitchen haven and, unless specifically called upon, my nosy interjections, to Nick and his process.  If you are a regular reader of this blog, I have given you glimpses of this succulent meat, but not until now have I been able to give up the recipe.   It is only after 4, nay 5 attempts at perfection that I am allowed to document it.  Sometimes Nick's complaint is a less than perfect texture, but searching for the perfect balance of spices has also taken some time.  Nick resembles some sort of mad scientist or potion maker mixing and measuring condiments and spices.  Then it is a 6-8 hour process  of slow cooking this meat on the grill, frequently checking that the temperature doesn't get too high.  It's like Atlas holding up the sun and drinking beer with his other hand.

It all starts with a good cut of meat.  This one is from Brooklyn Kitchen.

Here you need to trim the layer of fat around your brisket until it is about 1/4 to 1/8 of an inch thick.


Nick's Slow Cooked Barbecue Brisket
  • a 3 to 4 pound beef brisket
  • canola oil
  • apple juice
For the Dry Rub:
  • 1/8 cup garlic salt
  • 1 1/2 teaspoon ground black pepper
  • 1 teaspoon kosher salt
  • 1/2 teaspoon cayenne pepper
  • 1 tablespoon chicory coffee (like Cafe Du Monde brand)
For the Wet Rub:
  • 1 1/2 tablespoon ground mustard
  • 1 1/2 tablespoon Worcester Sauce
For the Wrapping Mixture:
  • 1/4 cup maple syrup
  • 1/4 cup brown sugar
  • 2 tablespoons butter 
*The technique for this brisket is adapted from Adam Perry Lang's book Serious Barbecue.  Adam Perry Lang is owner and chef of Daisy May's BBQ.
  1. Mix your seasonings in three separate bowls.  Add you wet rub to the meat and then the dry.  let sit for 1 hour.
  2. Preheat your charcoal grill with a packet of hickory wood chips to 275 degrees.
  3. Using your hands or a brush, evenly, but lightly coat the brisket with canola oil.  Insert a remote thermometer in the thickest part of the brisket. 
  4. Put your brisket on the cooker with the fat side down.  After 2 hours, spray every hour with apple juice.   Cook until the internal temperature reaches about 165 degrees, should take 6 1/2 to 7 hours.
  5. Lay out two sheets of aluminum foil (heavy duty is probably best), put you brisket on top, and pour your wrapping mixture over it.  Wrap it up securely and reinsert your thermometer.  Put back on the grill and cook until the internal temperature is 195 degrees.  Should take 2 to 2 1/2 hours.
  6. Line a small cooler with an old, clean beach towel for insulation.
  7. Remove your brisket form the grill and carefully unwrap over a baking dish or disposable pan, reserving the liquid.
  8. Lay out 2 more sheets of aluminum foil and put your brisket on it.  Over a measuring cup, strain the reserved liquid from the baking dish through a fine mesh strainer.  Discard the solids.  Allow the fat to come to the top, pour off and then discard.  Pour the defatted liquid onto the brisket.  Wrap your aluminum foil around your brisket place in a disposable pan or baking dish and transfer to cooler.  Cover with towel, close the lid and let rest for 1 hour.  When the brisket has rested for 30 minutes, increase your cooking temperature to 300 degrees.
  9. Place your meat back on the grill for 30 minutes.
  10. Cut your meat on a cutting board.  Make sure you cut against the grain.  Lang says to let it rest 10 minutes, but so far we have not been able to show that kind of restraint.


Sunday, June 19, 2011

Dinner on the Fly: Duck Confit Carbonara with Braised Greens and Garlic Scapes


I fantasize about a butcher.  Not just the man but the place. No styrofoam, no plastic, just smooth brown paper that creases clean in the corners, folded on a steel countertop.  The man behind the counter would wear a white apron with red stains and an amiable greeting like your friendly neighborhood serial killer.  At some point we would know each other by name.

I realize that as a New Yorker I have no right to complain about not having access to anything.  It is true that I can get pretty much any exotic ingredient that is worthy of a trip outside my five mile radius (that travel time being equivalent to thirty miles outside the NYC area).  But we can eat just about anything from from grizzly bear to emu to any number of reptiles.  Does anyone ever wonder how we narrowed our choices down to just three; beef, chicken and pork?  In my utopian fantasy, there would be world peace and a neighborhood butcher that sold not just pork, beef and chicken but rabbit, duck, ostrich, bison and something I could try on a dare.  

We don't eat meat everyday anyway, so our specialty meats are really a treat.  Usually the result of a special outing. Duck, although not high on the list of exoticism, is a rare and coveted dinner at our house.   Especially for a week night.

Duck Confit

This is something you make ahead and use sparingly as it is very rich.  It is remarkably easy to for such a fancy sounding name. 
  • 2 duck legs
  • 2 garlic cloves
  • extra duck fat to cover the duck legs
  • tiny sprig of rosemary (optional) 
You need a oven proof dish that is just big enough to fit your duck legs.  Do not preheat our oven.  Place one garlic clove and rosemary sprig under each duck leg.  Cover almost entirely with extra duck fat.  About one cup to 2 legs.  Put your duck in the oven and turn it on to 250 degrees.  You want the duck in the oven while it is pre-heating.  This is super slow cooking on very low heat.  Leave for 2 to 2 1/2 hours.

Duck Confit Carbonara with Braised Greens and Garlic Scapes
  • 2 tablespoons duck fat from the duck conft
  • 1 bunch of braising greens such as mustard greens, spinach, kale or chard, chopped
  • 5 garlic scapes
  • 2 eggs
  • 1/4 cup grated grana padana
  • 1 lb of spaghetti
  • Duck meat from confit for serving
  • sea salt
  • freshly ground black pepper
Salt your water and boil your pasta. Beat your eggs and cheese together Melt your duck fat in a skillet or large sautee pan.  Add your greens and garlic scapes.  If they get a little dry as they are cooking add a little of the pasta water.  When pasta is done add it to your greens if the pan is big enough.  If it isn't you can do the reverse.  Add your egg mixture and toss for a few minutes.  The egg will cook and thicken with the heat of the pasta but not separate. Add salt and pepper to taste.  Serve with duck meat on top.