Wednesday, October 20, 2010

The Classics: Apple Pie

I don't want to mess with apple pie. I don't want to change it or improvise with new ingredients.  No contemporary twist necessary thank you very much.  Not today.  Instead I would like to be taken to my comfort zone.  I want to return to the same fall story.  Sweaters, foliage, crisp air, apples, pie.  When my mom made apple pie growing up it was an event, a celebration of fall.  This Saturday was Nick's birthday and he wanted to go apple picking for the day.  I can't think of a better excuse to make apple pie. These pictures are from Stone Ridge Orchard, a beautiful spot just a couple hours north of the NYC.

I have to admit something.  Baking intimidates me. As comfortable as I am with cooking, I am that tentative a baker.  It's having to measure exactly and follow directions that gets this fly-by-the-seat-of-her-pants gal.  With cooking I can be spontaneous.  You know, a little of this, a dash of that.  Inevitably, whenever I try to bake, something goes wrong.  I added too much baking soda or too little baking soda.  Oh no, I left out the baking soda!  Determination keeps me coming back though, if only a few times a year.  When my baking attempts are successful (and sometimes they are), it is truly satisfying, but clearly I need a little help.  How to Cook Everything, by Mark Bittman has been my trusted companion through many a cooking adventure and is what I usually turn to for a well prepared classic dish.   My copy of this book is a several years old and has been well used. Inside it is lovingly crinkled where some delicious concoction jumped right out of the pot and landed on its splayed pages. 

The first thing I need to do is be organized and prepared.  So I have lined up all the ingredients I am going to need like little soldiers preparing for battle.  Then I will measure out my dry components.  
I cored, peeled and chopped my apples.  Tossing them in lemon juice will keep them from turning brown if I am not going to use them right away.  
Nick and I did this little project together.  The two recipes we used in How to Cook Everything, by Mark Bittman were Traditional Apple Pie and Flakey Pie Crust with the Pie shell for Two Crust Pie variation.  As hard as we tried to stick to the recipe, there were still changes.  Tips from our moms, for instance.  My mom, Lydia, insisted I put a little more sugar.  The heart at the top of the pie is a trick from Nick's mom, Andrea.  The pastry heart keeps the knife slits from opening too much when the pie bakes (or it just looks cute).  The other hearts were my idea. Purely decorative.

I feel a little better about baking.  This was not so difficult.  The result was great.  Considering we still have a gazillion more apples, it looks like I will be baking again really soon.


Sunday, October 17, 2010

Table Style: Ode to a French Butter Bell


Have you seen one of these?  Maybe you are wondering why my head has been under a rock for so long but I only just discovered this charming little crock.

One weekend not long ago, Nick and I were visiting our friend, Janice, in Beacon.  Imagine a beautiful, historical Victorian house on a hill overlooking the Hudson River.  After a wonderful day at the Dia Beacon (quite possible one of my favorite places) we had a lovely evening getting acquainted with new and friendly faces.  The next morning, I was the first one up in the quiet house and went to sit in what is my favorite room in any home.  So I slipped out of the bedroom, crept down the stairs and into the sunny kitchen complete with glass door cabinets, tall windows and exposed brick over the stove.  It wasn't long before Janice joined me.  She set a white, french teapot before me and we gossiped like high school girls (or at least the girls we were in high school).  When the rest of the gang got up, Janice played the good hostess and started on a breakfast spread that included some of the best blueberry pancakes I ever had.  She then offers us our syrup and butter and I notice the most charming little ceramic pot. "Haven't you seen one of these?" she asks as I marvel at the soft, perfectly spreadable consistency of the butter. "It's a butter bell."

Sometimes, it is the smallest details on the table that can also make a meal memorable.  Not to mention that the design of this crock is ingenious.  You add a little cool water to bottom half of the pot and butter is smashed down into the vessel attached to the lid.  The water will create a seal and regulate the temperature in the pot so that the butter keeps a long shelf life and remains in a soft and spreadable state.

I must admit the following morning I resolved to get one.  Being an artist myself I checked on etsy.  There is a lovely selection of these beautiful and functional objects.  I bought mine from a shop called claypots and am truly impressed by the workmanship.  Check out some foodie potters when you get the chance.  I am looking forward to trying out some flavored butter recipes.

Tuesday, October 12, 2010

Sunday Night at Home: Campanelle with Winter Squash, Pancetta and Sage

I love the way a winter squash smells when you cut it open.  It smells like trees and the first crisp, cool air of autumn.  I start collecting them this time of year.  Sometimes I have more than I can eat.  Each one is different and they are marvelous.  Secretly they remind me of a Clyfford Stills painting with stripes of green ripping through the yellow or orange bleeding through green.  They are my favorite token of fall.
I think some tend to shy away from cooking winter squash.  When I was growing up I can remember pumpkin being served but it was strictly Thanksgiving fare and strictly in the form of pie.  I am going to bet here that our pumpkin pies never began with actually peeling a pumpkin but rather opening a can.  During my years as an art teacher, I had annually brought to class an armload of colorful gourds, pumpkin and squash as still life props for painting classes.  (They are wonderful in color mixing lessons I must say!)   Although they were recognizable to everyone, many students didn't know they were edible. ("You mean like jack o'lanterns?  You can eat those?")  

Truthfully, that hard skin is intimidating.  Then there is the question of what to do with it.  If it isn't normally a household staple than how do you know how to prepare it?  There isn't much you have to do to winter squash actually.  It is naturally sweet and starchy.  Besides, If you can get that puppy peeled the flesh is not so hard to deal with.  It will cut easily and cook quicker than you think.  
I used what's called a Sunshine Pumpkin (the very orange one in the top picture).  You want to cut the top and bottom off to give you some leverage before slicing through it.  Then go ahead and remove the seeds.
Cut your squash into chunks.  

Ingredients:
                             1 winter squash
                             2 thick cut slices of pancetta or bacon
                             1 small bunch of sage
                             1 red onion (optional, I didn't use it but it might bring out the sweetness in the squash)
                             salt
                             pepper
                             2 tablespoons of olive oil
                             1/4 to 1/2 cup of milk
                             1/4 to 1/2 cup of water
                             grated parmesian cheese 
                             1 lb. campanelle or other macaroni 
Heat your olive oil, then add pancetta, onion if you are using it, and cut up winter squash.
As the squash is sauteeing it is going to start to get dry.  Add liquid (milk and water) as needed.  This will steam them and some will disolve into a creamy sauce.  When the squash begins to soften add chopped sage leaves.
Toss in your cooked campanelle and top with grated parmesian.


Saturday, October 9, 2010

Accompaniments: Sweet and Sour Apple Jelly with Caramelized Onions


This summer I became a mad pickler.  I couldn't help it.  All it took was a few to many cucumbers and an extra head of cabbage from our CSA share and I couldn't stop.  I pickled radishes, peppers, red onions and jalapenos.  What can I say?  I am frugal.  I hate waste.  Didn't your mother ever tell you about the starving children in Africa?

The truth is I have more pickled cabbage in my fridge then I know what to do with.  I must admit it is nice to put homemade pickles on an appetizer plate with olives and cheese when an unexpected guest drops by.  Or maybe my guests are trying to be polite and really thinking "what's with all the pickles?"

Despite the (wait let me count them) six jars of pickles I have left in my fridge, I recently purchased a jar of red pepper jelly off my Long Island City CSA.  It did not last longer than a week.  That is a sure sign that I need to change gears in my food preservation efforts.

I started looking at different recipes for red pepper jelly. Their is definitely more than one way to achieve this sweet, hot, peppery goodness.  Being me, I came up with something a little different.  ( I have always had trouble following directions.)  This recipe focuses more on apples with just a little peppery heat.  I thought that caramelized onions would work really well with the sweetness of the apples.

I found these beauties at the Greenmarket in Maccaren Park.  How could I resist?

2 cups sugar
1 tablespoon pectin
2 cups apple cider vinegar
1 teaspoon salt
4 (or more depending on how hot you like this) small hot peppers such as jalapeno, chopped 
2 apples, chopped
1 red onion chopped fine


Combine cider vinegar, salt, apples and peppers in a pot and simmer for about 20 minutes.


Cover a strainer with cheese cloth and set it over a heat proof bowl.  Let the liquid seep into the bowl and then discard the apples and peppers.  In a separate bowl mix together sugar and pectin.

In the same pot add grape seed oil and slow cook onions on low heat until they are soft and golden on the edges.  Then remove the onions and set aside on a paper towel.  Add the liquid/vinegar from the bowl and return to medium heat.  Slowly stir in sugar and pectin mixture.  While this is simmering use a thermometer to measure the temperature of the liquid.  When it reaches 215 or 220 degrees it is ready.  Add your onions and stir.  Spoon a little on to a cool plate to test.  It should gel when cool.

Serve with your favorite cheese and baguette!


Tuesday, October 5, 2010

Supper Club: Potluck Bar-B-Que

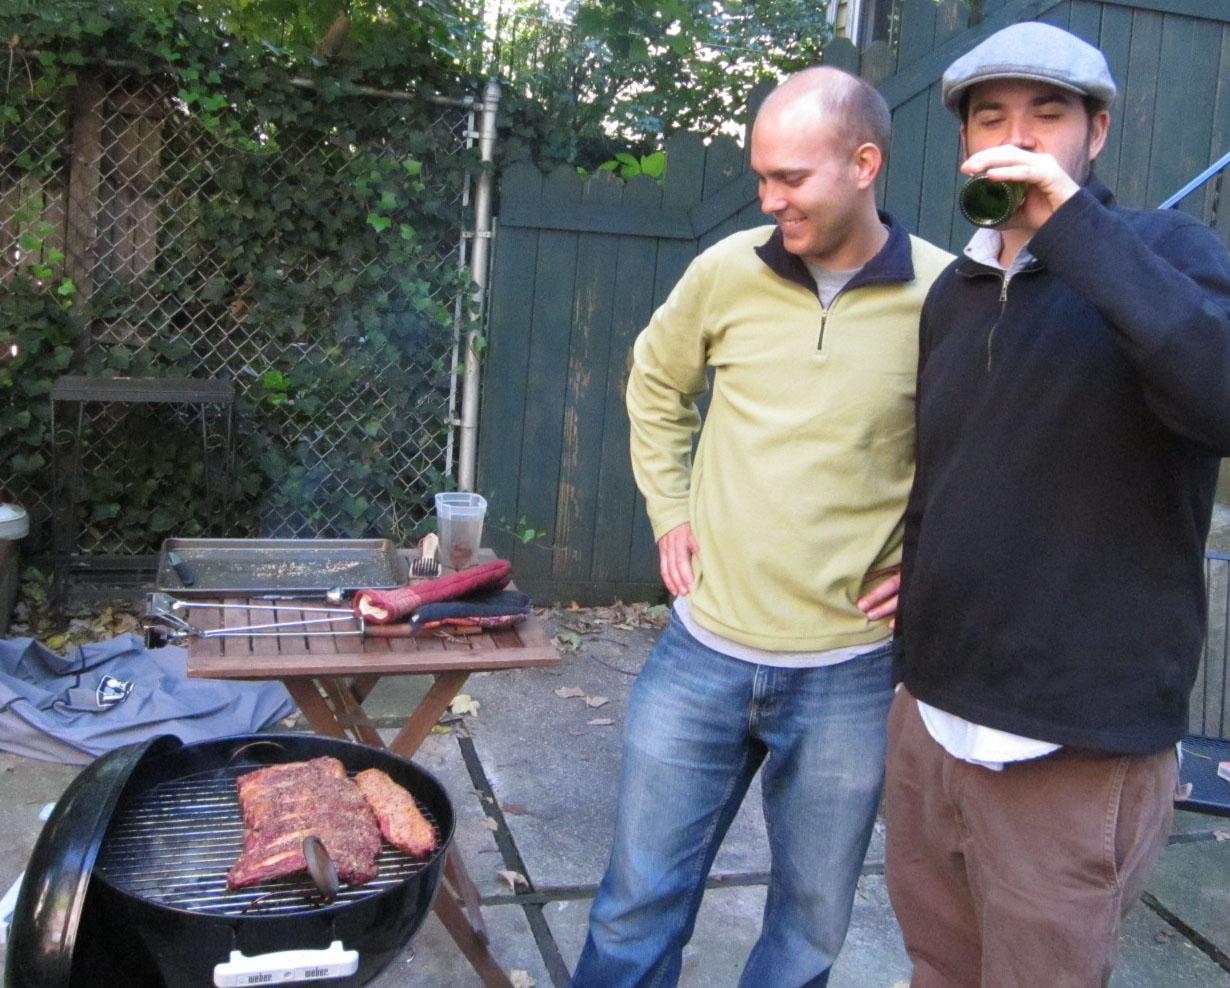
Who says you can't have a bar-be-que past labor day? May be even a month past labor day.  It seems that most of Nick's favorite foods begin with the word "barbequed."  This summer he bought a new charcoal grill and, with the help of our our friend, Joe, has been exploring smokey, grilled meat as an art form.  It is hard work, let me tell you.

Choosing the meat is the first chore.  I picked up a rack of grass-fed beef ribs from a CSA in Long Island City where the meat is provided by Lewis Waite Farms. http://www.lewiswaitefarm.com/csa.html
Nick and Joe picked up another rack of pork ribs from Topps Supermarket in Williamsburg along with a six pack of Stella.  They start with a homemade rub made by grinding mustard seed, brown sugar, peppercorns and salt in our molcajete. 


Then they slow smoked the meat starting at around noon for  about 4 hours at 200 degrees.  This is a long day of labor that entails checking the meat, talking about the meat, playing music and drinking beer.  That leaves me to come up with some complimentary sides.

Buttermilk Mashed Sweet Potatoes with Chives

This is a nice fall variation on our regular mashed potatoes.  Sweet potatoes can be a little intense for a mashed potato dish so I like to mix them with a white or gold potato.  In this case,  I used three small, red russian potatoes to one large sweet potato.  If you have never had or seen a red russian potato it looks like your standard red potato but has golden flesh like a yukon gold.
You want to cook the potatoes until they are soft, not just cooked through.  Then you will get a nice creamy consistency.  Add a pat of butter, salt, pepper, buttermilk and chives, then blend with a hand mixer.

Roasted Eggplant and Yellow Tomatoes

If there is any thing that tastes like the end of summer (although I know it is early fall) it is this dish).  The tomatoes and eggplant paired with basil are bright and fresh tasting.  They pair nicely with the richness of the meat and potatoes.
First I drizzle a little olive oil on the bottom of the a baking dish.  Then I start layering slices of eggplant and tomatoes, giving a little drizzle of olive oil again on top and a sprinkle of salt and pepper.  Then I top that with basil leaves and sprinkle with parmesan cheese (mozzarella would also work nicely).  Repeat three times lasagna style.  Bake at 400 degrees for approximately 30 minutes.

Our friends Kevin and Kate made an incredible bagna cauda.  Bagna cauda is an Italian crudite with a dipping sauce made from garlic, olive oil and anchovy. 
Eggs and veggies for the bagna cauda.


Before the meat was brought out we had to admire the sides.  From top left, buttermilk mashed sweet potatoes,  spicy quinoa salad (made by Joe who is sitting on the left.),  the covered dish is the eggplant and tomatoes, and the bagna cauda is in the saucepan surrounded by goodies to dip in it.

The main course is bought to the table!  

Sometimes eating at home is better than eating out.