Tuesday, May 15, 2012

Sipping Once, Sipping Twice, Sipping Chicken Soup with Rice

Maurice Sendak, you will be missed.  You understood so well the loneliness children feel with their inability to articulate their feelings.  You understood that childhood is not all sweetness and innocence but also the first phase of struggles to overcome. There is still a copy of "Where the Wild Things Are" in my night stand to remind me that even in my most frustrating moments, I can always sail home.  Thank you for giving our young selves the words and illustrations we needed.  Thank you for not underestimating our feelings.

I felt a great sense of relief when after Max had decided to return from his great and perilous adventure, after he left his new and terrible friends, that here was a bowl of something steaming and delicious brought to his room.  I could just taste it.

On snow days and sick days my mom would read "Chicken Soup with Rice" from the Nutshell Library to remind us of the comforts of home when storm or flu kept us indoors.  I am home sick today and thinking of Old Bombay, my favorite line in the poem when the young illustrated Maurice imagines traveling to exotic lands to "dream about hot soup all day."

I declared that I would ride an elephant in Old Bombay, to which my dismayed mother would always reply, "Oh no, please don't go, I'll eat you up, I love you so."


This is a take on both a traditional chicken soup with rice recipe and an Italian creamed soup with chickpea, porcini and farro.  I added the elements of that soup while swapping the farro out for black wild rice.   Both exotic and familiar.


Creamy Chicken Soup with Wild Rice, Mushrooms and Chickpeas

For the stock:
  • 1 lb chicken parts
  • 2 small or 1 large onion
  • 2 stalks of celery 
  • 2 garlic cloves smashed to removet he skin but other wise kept whole
  • 2 carrots
  • 2 small or one large bay leaf
  • 7 to 9 sprigs parsley
  • 7 to 9 sprigs dill
  • 1 teaspoon peppercorns
  • 1 teaspoon juniper berries
  • 10 cups water
  • salt to taste
For the soup:
  • 6 cups above chicken stock
  • shredded cooked chicken from above stock
  • 1/2 cup dried porcini mushrooms
  • 10 oz to 1 lb chopped mushrooms such as crimini, portabello, standard white button, oyster or a mix of these
  • 2 cups cooked wild rice
  • 1/4 cup heavy cream
  • 3 cups chickpeas pureed or mashed into a paste
  • 1 chopped onion
  • 1 stalk of celery chopped fine 
  • 2 garlic cloves sliced
  • 1 carrot chopped fine
  • 1 bay leaf
  • fresh chopped parsley for serving
  • fresh chopped dill for serving
  • 3 tablespoons olive oil
  • sea salt  and white pepper to taste

Put the dried porcini in a small bowl of water. 

In a large stock pot, combine all the ingredients for you chicken stock.   Cover and and bring to a boil.  Once it is boiling, lower the heat to medium and simmer until the liquid reduces by one fourth.  Remove the chicken and set aside to cool.  Put a colander over a large bowl and strain the broth.  Discard remaining ingredients.
In a dutch oven, heat the olive oil.  Add your chopped onion, carrot, celery and garlic.  Sautee` until they soften.  Add mushrooms and continue to sautee until the mushrooms reduce in size. When the vegetables start to get dry, add the cream.  When the cream is absorbed by the mushrooms, add the stock and the bay leaf.  Simmer over medium low heat and reduce to desired thickness.  When the chicken is cool separate the meat from the bone and chop to shreds.  Add your cooked rice, shredded chicken and salt and pepper to taste.  Serve with chopped fresh herbs.

Wednesday, May 9, 2012

A Fresh Look for Kitchen Chairs

I love my kitchen.  I don't mean I love kitchens.  I do, of course but that is not what I mean to say here.  I mean I love my kitchen.  After 15 years of living in Brooklyn I have been blessed with a dream kitchen.  It is spacious enough for a dining table and over looks the building's flower garden.  All of you jealous city dwellers feel comforted by the fact that I was once in your shoes.  In most of my Brooklyn kitchens I had to lean against the wall in order to open the refrigerator door.  Thanks to a generous stroke of good luck (proceeded by a few strokes of bad luck, which is a story we will save for another day) we are able to enjoy a well lighted, well cared for and spacious kitchen.  I will say that I did the same kind of cooking in my tiny kitchens as I do in this one and never shied away from dinner guests or parties.  It is possible, it just poses different organizational challenges. 

As a textile designer this is my favorite time of year.  At work we are scoping out new trends in colors patterns and fabric construction.  Spending a day in the fabric district, shopping and learning about new fabric styles and techniques feels a lot like when my Uncle Nino gave us free reign in his pastry shop. I can't help but bring a little of what I see home.  

I like updating the look of my kitchen with a rotation of textiles.  This works well particularly since our kitchen is mostly white and neutral.  Reupholstering these chairs has been on my project list for a while.     I found this fabric at Mood Fabrics.  If you haven't heard of Mood, it is an overwhelming 3 floors of gorgeous fabrics and popular among designers and trendy design students (largely form FIT).  So for this project, let me narrow it down for you, head downstairs. For a richer look, go with a fabric that is woven vs. printed. The printed fabrics at Mood are beautiful but on furniture the woven will give a more upscale look.  I like take to take a bunch of swatches to see what works best in my home.  

I haven't reupholstered chairs before but it was surprisingly easy.  If you are thinking of recovering your own chairs you will need the following supplies:
  • one pair of good quality fabric scissors
  • measuring tape
  • a staple gun with extra staples
  • 1 and 1/2 yards of fabric for 4 chairs
  • 1 fabric crayon
  1. Flip over your chairs and find how the seat is attached to frame.  For these chairs there were 3 simple screws that were easy to remove and put back.  I would recommend doing one chair first before taking the seats off of the other chairs so that you are comfortable with the process before you continue.  It is easier to fix a mistake once than four times.
  2. Measure how much fabric you will need to cover the seat of the chair.  Make sure you leave enough room to staple the fabric on the back.
  3. Staple the fabric to the back of the chair.  Staple once on each side of the seat directly across from the last staple.  Continue stapling in this order.  When you get to the corners, create a neat fold in the fabric and then staple. Make sure all of your folds are consistent and facing the same way.
  4. Reattach the seats to the frame.

Before
After


Sunday, April 29, 2012

Dinner on the Fly: Skate and Radishes in Anchovy Brown Butter and Olive Oil Mashed Potatoes and Dandelion Greens

In the spirit of Spring let me post this dish.  Walking around Essex market I was stopped by some dandelion greens.  There is only one time of year when you see them.  Unlike asparagus which you can get all year round but probably shouldn't, dandelion greens are only seen in certain markets in Spring.  They are a earthy and very bitter green.  I highly recommend this recipe for Ligurian mashed potatoes and dandelion greens by Mark Bittman.  It's a great recipe to use with any spring green actually and simple enough for a busy week night.   Remember that there are only four ingredients so make them count.  Use very good olive oil, sea salt and a flavorful potato.  Otherwise the subtleties in this dish can be lost. A good note for any dish that has very few ingredients.  

Radishes sauteed in brown butter is a favorite side dish of mine in Spring.  (See this earlier post.)  I recently made some anchovy butter and my sauteed radishes got a little update.   It was like falling in love all over again.  


 Skate and Radishes Sauteed in Anchovy Butter

  • 1 skate wing (should be enough for 2 people)
  • one large radish or 1 bunch small radishes
  • 3 tablespoons butter
  • 1 teaspoon anchovy paste
  • salt and pepper to taste (remember that the anchovy is also salty)
  • parchment paper
Preheat your oven to 400 degrees.  Cover a baking sheet with parchment paper.  Melt butter with anchovy paste in a medium skillet until golden brown.  Lay the skate wing onto parchment paper.  Drizzle a small amount of the butter onto the skate.  Fold the sides of the parchment paper in two or three times to seal, cover, and to make an envelope for the fish.  Bake in the oven for 15 to 20 minutes.

Sautee` your sliced radishes in the remaining butter.  Turn the heat down to medium low and cook until tender.  Serve over skate.  To remove the fish from the bone, slide a fork or knife down the contour of the bone on either side and the meat will come off in strips.

Tuesday, April 24, 2012

Mise En Place: Tea Towels from a Vintage Tablecloth


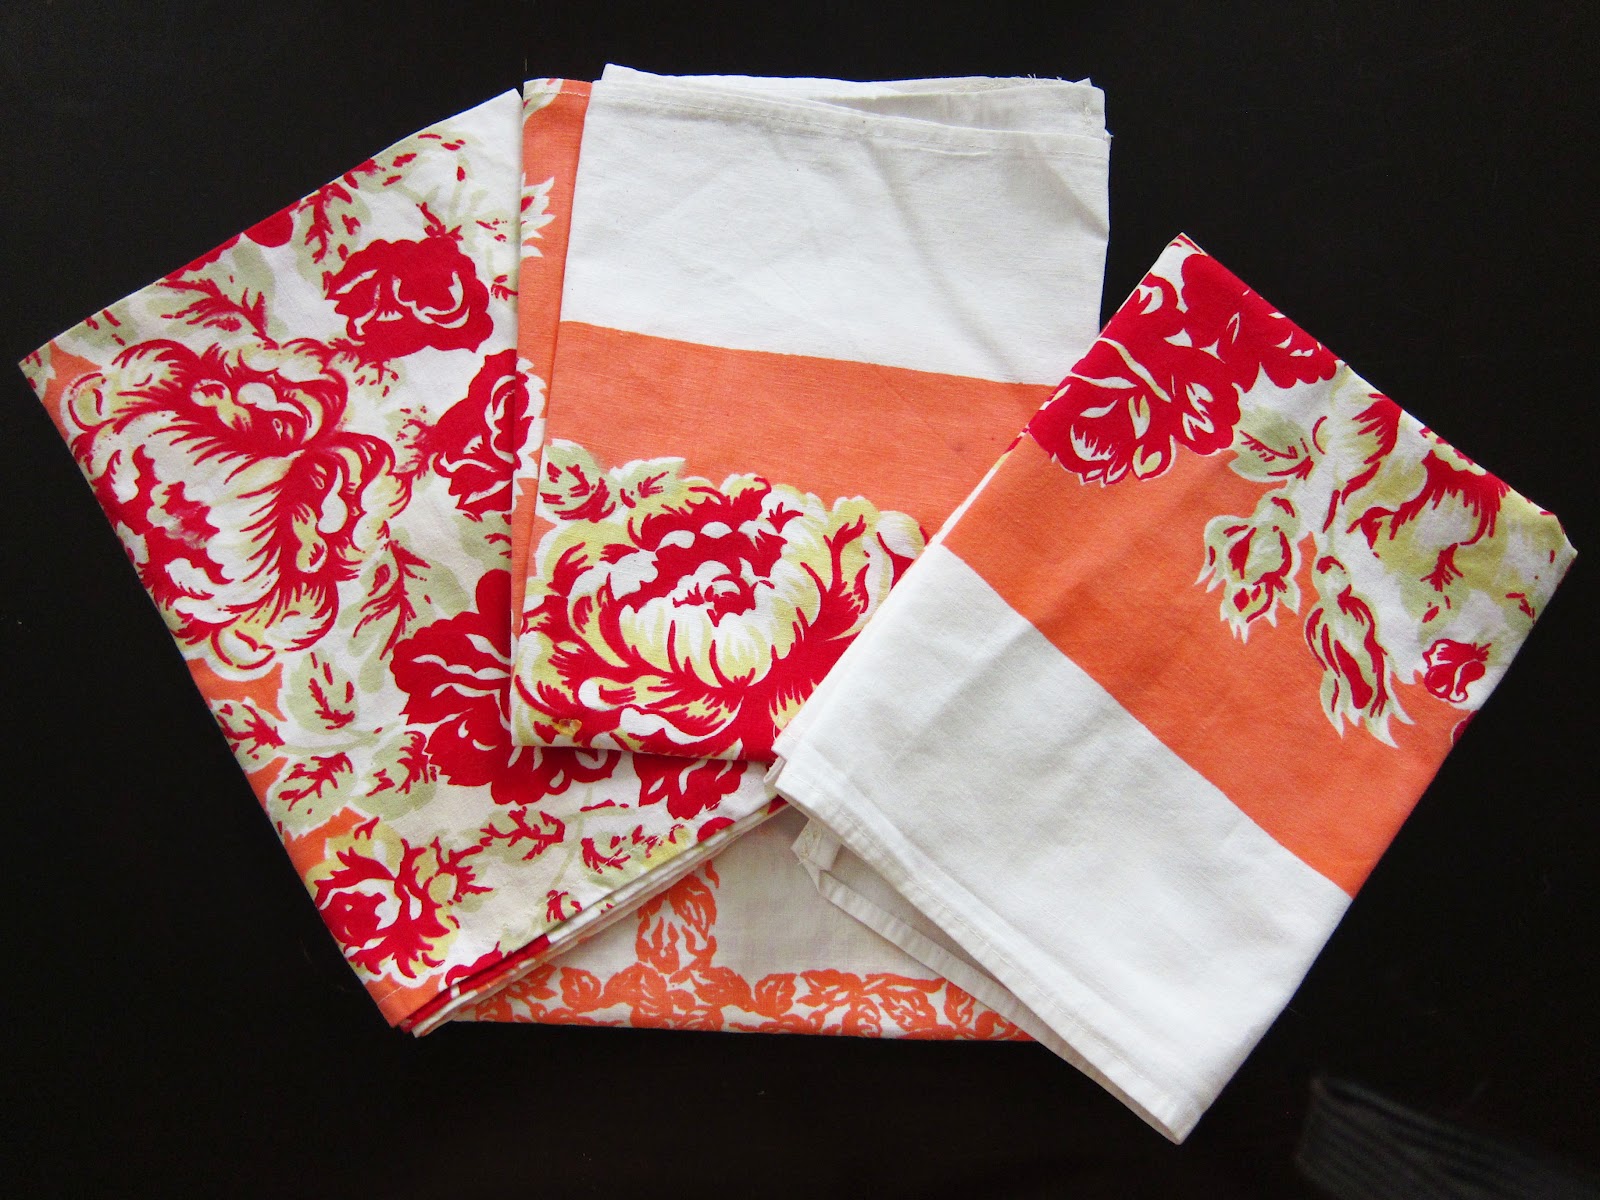
I had this tablecloth for years.  It had been well loved and was showing it.  A spot of wine here and big yellow stain in the corner, but I just couldn't throw it out.  It is already hard for me to throw out anything I feel like I can make use of but this had sentiment as well.  It was given to me after having been in the wedding party for my friends Ben and Erin (see Ben's awesome food blog You Fed a Baby Chili?).  I remember Erin planning her wedding and ordering a different vintage tablecloth for each table.  Afterward, she and Ben sent the tableclothes to select family and friends.  I loved this tablecloth and I loved being among the ones they gave it to.  Just look at the pop in those graphics!

In the spirit of being green I have been teaching myself to sew.  The process is slow going I must say.  I  also have to say that it is mighty silly that I work in textile design and I don't know how to sew.  So I have started with simple projects.  Some successful and some not but this was an easy success.  I turned my stained but loved cotton tablecloth into a charming set of tea towels.  No need for a pattern for this job.  I just used an older tea towel for the size, folded the cut edges over twice at 1/4 of an inch and used a straight stitch.

For good deals on vintage tablecloths, fabrics and tea towels check on ebay or etsy.


Sunday, April 22, 2012

Simple Spaghetti Pie

So I have been practicing this one.  It looks good going in the pan but it is a tricky thing to turn it over.  Do I use a spatula?  Should I cover the pan with a plate, carefully turn it over and then return it to the pan?  Or do I make the gutsy choice of flipping and risk egg and spaghetti all over my kitchen?

Oh yeah,  I went for it.  Let me tell you I am proud of myself.  I shook the pan a little back and forth like marathon runner rocking to gain momentum before bolting forward.  I hurled this spaghetti upward and let go, fully prepared to have egg on my face, (pun intended).  But no, a split second later, there it was in one piece and showing me its underside.  Damn, no one there to see it.

I am talking about Spaghetti Pie, or at least that is what we call it in English.  I have heard it called by more than one name in Italian and I think that is depending on geographically where the one cooking it is from.  I remember it fondly as what we brought on picnics when I was growing up and it was always made out of our leftover spaghetti.

Thinking of trying this at home?  In the vein of full disclosure, this was not my first try.  I have tried flipping it with a spatula, a dinner plate and yes I have gotten egg all over my stove.  Here's what I learned:  it is all about your spaghetti/egg/cheese ratio. Three eggs to a pound of pasta isn't going to do it.  The best result I have gotten was when I thought I added way too much egg and cheese.  The pictures below show a simple version using some plain leftover spaghetti.  The spaghetti does not have to be plain.  That's like saying all ice cream should be vanilla.  It doesn't even have to be spaghetti for that matter.   One of may favorite versions of this dish was made by a cousin of mine from a leftover pasta salad with salmon (Thanks Clara!).  Just make sure you have plenty of egg and cheese and then you can flip it any way you like.


Simple Spaghetti Pie

  • 6 eggs
  • 1 cup grated Parmesan or Romano cheese
  • 1/4 of a pound cooked pasta (about a bowlful)
  • freshly chopped basil of parsley (optional)
  • sea salt
  • freshly ground black pepper
  • 3 to 4 tablespoons of olive oil
Beat the eggs cheese in a medium bowl with a fork or a wire whisk.  Add salt, pepper and chopped herbs if you choose to add them.  Add spaghetti to the eggs and cheese.  Heat your olive oil over medium high heat.  Remember you don't want you olive oil to get to a smoking point.  When I tip my pan and the oil runs like water it is hot enough.  Add your egg, cheese and spaghetti mixture and cook until the underside is set.  You may need to lower the heat so your egg doesn't get too brown.  When the bottom is fully cooked, cover with a dinner plate and turn your pan over with both hands (don't forget you oven mitt!) then slide back into the pan.  Or flip it in the air if you are feeling brave!  Cook until the bottom is set.  You can check the center with a fork.  If the center is dry, its done.

Friday, April 20, 2012

Accompaniments: Romanesco Sauce


You think this sauce is all about the peppers.  Try it again.  Roasted peppers, yes, but there is more going on here.  This sauce has more substance than that one ingredient can offer.  Actually, it is a nut based sauce, like pesto and, having tried it again, my less naive palate now gets that the nuts are as important to this sauce as the smoky ancho chili.  I served this with a simple steamed white flaky fish but that didn't keep us from dipping our crusts of bread right into the bowl.  Spanish in origin, I have often seen recipes that pair it with fish.  But why set up limitations?  Simple sauteed chicken or vegetables for dinner?  Pair it with romanesco sauce and huzzah! It's like a holiday!

Romanesco Sauce
  • 1/2 a cup of tamari almonds (you can use regular almonds but tamari almonds are already seasoned with a little soy)
  • 1 head of garlic
  • 4 tomatoes
  • 2 small sweet peppers or one red bell pepper
  • 1 dried ancho chili
  •  2 tablespoons of red wine vinegar
  • sea salt 
  • 1/3 of a cup of good olive oil
  • one glass of lukewarm water
Preheat your oven to 375 degrees. Core your tomatoes and peppers but keep them whole. Cut the top off the garlic head and discards any skin that is loose and falling off.  Place peppers and garlic in ceramic bake ware (like Corning ware).  Drizzle with olive oil and sprinkle with sea salt.  Roast for about 45 minutes covered.

Heat a few tablespoons of olive oil in a skillet on medium high heat.  Add almonds and toss for thirty seconds or until they become fragrant.  Remove almonds and add ancho chili.  Heat thirty seconds on each side.  It should also become fragrant.  Remove and soak in a glass of lukewarm water until it softens.


When roasted peppers and garlic are done, let cool.  When cool enough to touch, gingerly squeeze the garlic cloves out of the head.  Add all ingredients to your food processor and pulse.  If you don't have a food processor, you can use a large mortar and pestle to pound the ingredients into a paste. 


Wednesday, April 18, 2012

Inspiration Outing #7: The Doughnut Plant

Mmmmm...doughnuts.  Sugary, fried, yeasty sticky doughnuts.  Sink your teeth into one of these an they will dissolve leaving only sugar crystals and maybe a cream mustache on your lips.

I had always wanted to try this place.  Well maybe always implies that I have always known about it and though I would like that to be true, it isn't.  I should say I have wanted to try this place since I first heard it mentioned by food writer Cathy Erway (if you don't know her she writes the popular blog Not Eating Out in New York and is author of the book The Art of Eating In.   I started asking my foodie and non- foodie friends, "Have you heard of this place called The Doughnut Plant?  They have flavors like salted peanut and some of them are square?"

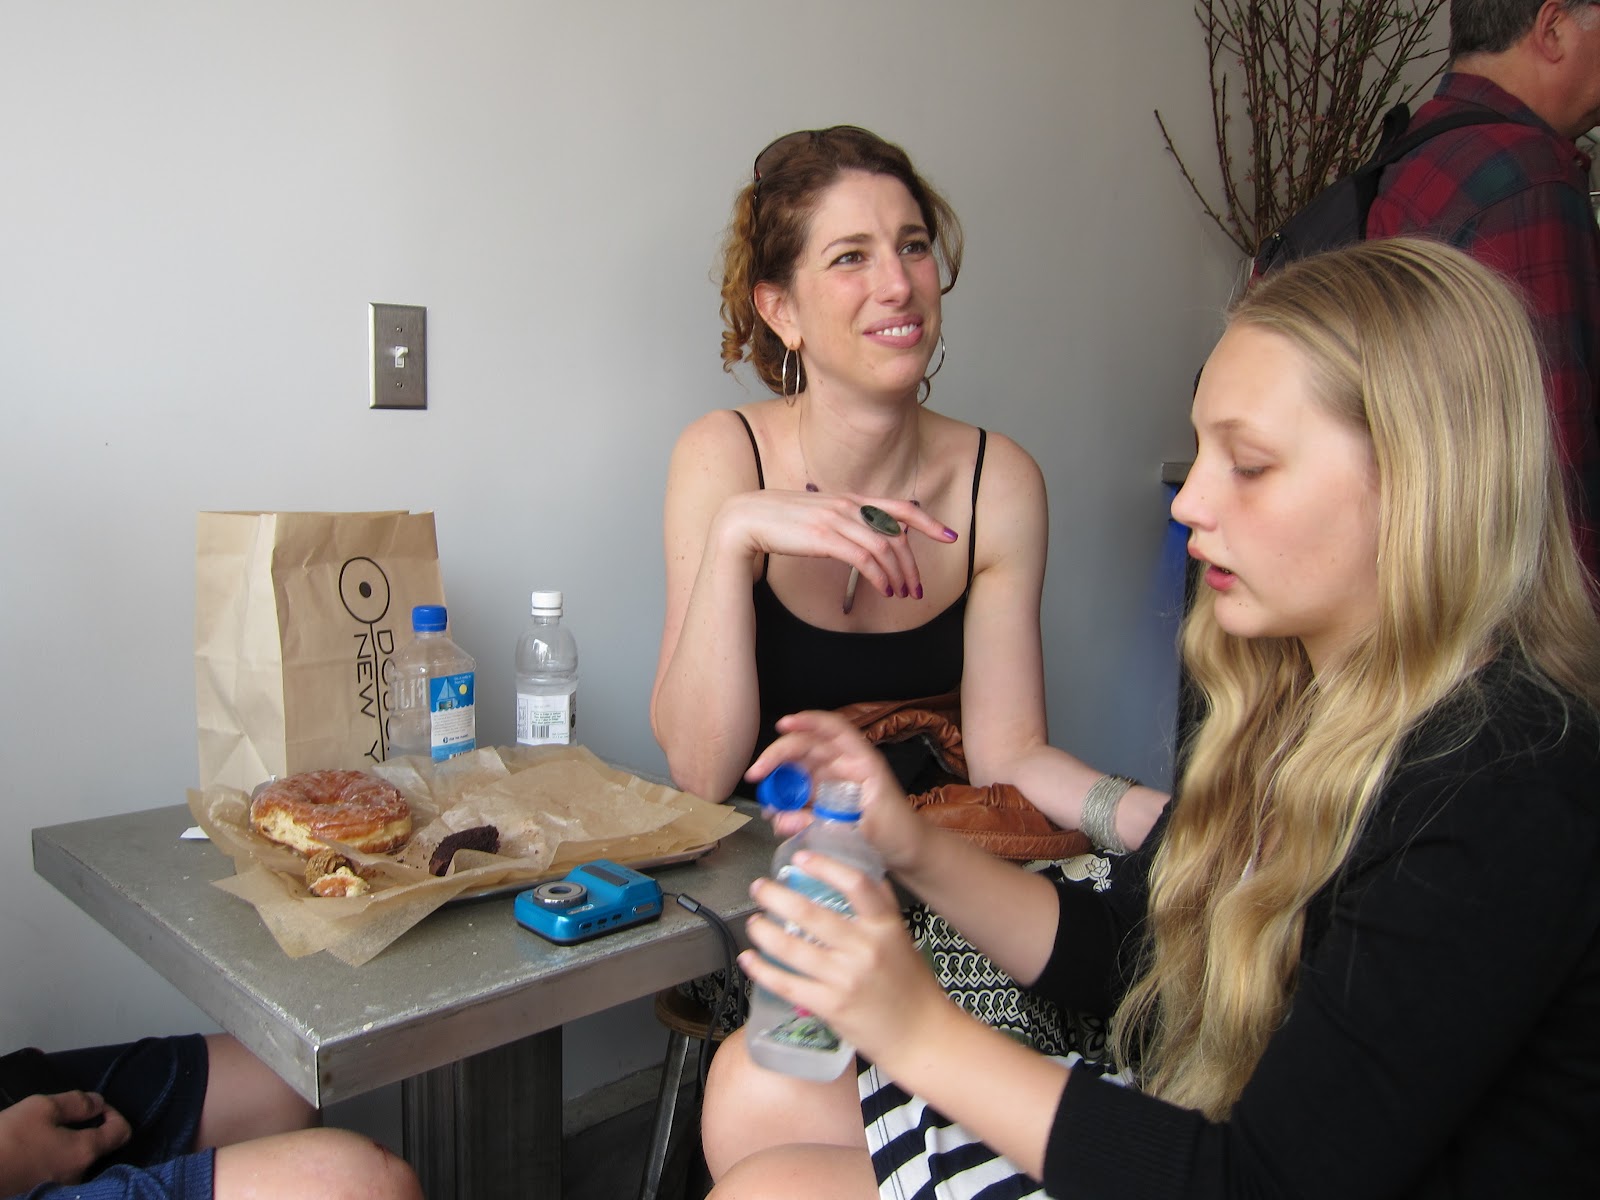
So when asked what my birthday wish was this year, I had to respond sincerely and say that it was to stuff my face with doughnuts in as many flavors as possible with a few lovely people who would enjoy that just as much. And after having eaten more doughnuts than a girl ought to consume in one sitting, I can say that I was not disappointed.  A whole lot of doughnuts worth of not disappointed.

But seriously, if you live in New york or are thinking of visiting, go to The Doughnut Plant on Grand Street.  But try to have some self control.