Wednesday, April 18, 2012

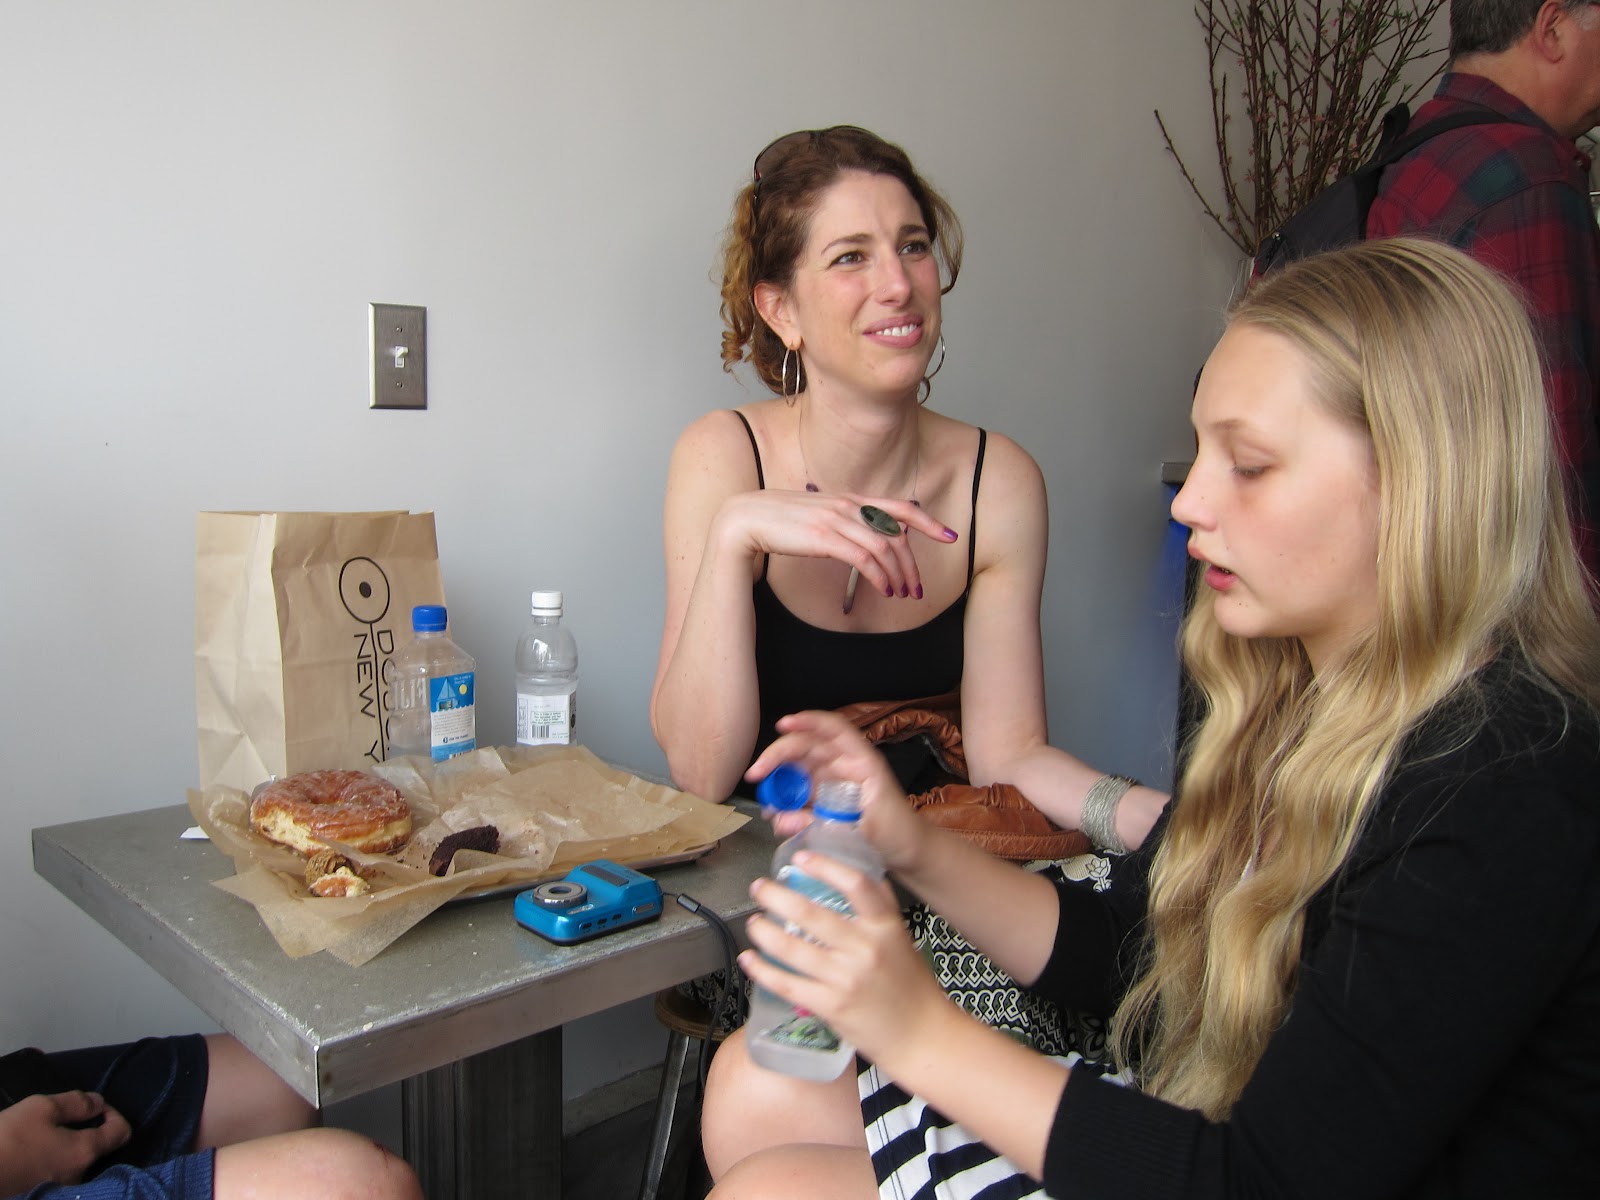
Inspiration Outing #7: The Doughnut Plant

Mmmmm...doughnuts.  Sugary, fried, yeasty sticky doughnuts.  Sink your teeth into one of these an they will dissolve leaving only sugar crystals and maybe a cream mustache on your lips.

I had always wanted to try this place.  Well maybe always implies that I have always known about it and though I would like that to be true, it isn't.  I should say I have wanted to try this place since I first heard it mentioned by food writer Cathy Erway (if you don't know her she writes the popular blog Not Eating Out in New York and is author of the book The Art of Eating In.   I started asking my foodie and non- foodie friends, "Have you heard of this place called The Doughnut Plant?  They have flavors like salted peanut and some of them are square?"

So when asked what my birthday wish was this year, I had to respond sincerely and say that it was to stuff my face with doughnuts in as many flavors as possible with a few lovely people who would enjoy that just as much. And after having eaten more doughnuts than a girl ought to consume in one sitting, I can say that I was not disappointed.  A whole lot of doughnuts worth of not disappointed.

But seriously, if you live in New york or are thinking of visiting, go to The Doughnut Plant on Grand Street.  But try to have some self control.


Thursday, March 22, 2012

Ragu Bolognese


This is one of Nick's absolute favorite dishes.  I should have written about it before now.  It is the ultimate in comfort food and a recipe I have made so often I know it in my sleep.  Particularly because I am a stickler for how it is done.  It isn't difficult or complicated but when one step or ingredient is amiss I can taste it.  

I have had some lively discussions with fellow enthusiasts of this dish as to its contents.  Some use tomato, some don't.  There have been those known to use red wine (although I prefer dry white so as not to overpower the other flavors).  Some use just beef and others use beef, veal and pork in thirds.  My brother does a great version using that variety of meat, pancetta and minus the tomato.  I always like the fresh contrast of tomato and parsley against the richness of the meat.  These ingredients are flexible but it is the liquid reductions that are important in tenderizing the meat and infusing it with flavor.  First milk, then wine and, if you like, tomato.  It is those reductions that define the difference between a meat sauce and a ragu.

This recipe will make a decent amount so you should know that it freezes well, is awesome over polenta as well as pasta and will make your lasagna unforgettable.

Ragu Bolognese
  • diced pancetta
  • 1 lb ground beef
  • 1 onion chopped
  • 2 to 3 carrots finely chopped
  • 2 celery stalks, ends trimmed and chopped
  • 2 cups milk
  • 2 cups dry white wine
  • 1 cup San Marzano tomato puree (or about half a 16 oz can)
  • freshly ground nutmeg to taste
  • 1/4 cup chopped parsley
  • 2 to 3 tablespoons olive oil
  • salt (kosher or sea) to taste
  • freshly ground black pepper to taste
  • freshly grated parmesan or romano cheese to taste
In a heavy bottomed sauce pot or dutch oven, saute` pancetta in olive oil just enough to give it color and to render some of the fat and release the flavor.  Add your chopped aromatics, onions, celery and carrots.  Saute` until soft and the onions are translucent.  Add your ground meat and cook until no longer pink, breaking it up into smaller and smaller chunks while it is cooking.  Add milk and let simmer until the milk is absorbed into the meat, about 15 minutes.  Add freshly ground nutmeg to taste.  Add wine and let simmer until it is absorbed into the meat, also about 15 minutes.  Add your tomato puree and let simmer for a minimum of 30 minutes but up to an  hour stirring occasionally.  Add parsley, salt and pepper before serving.  Serve over pasta or polenta with grated cheese. 

Thursday, March 15, 2012

Dinner on the Fly: Tarragon Quinoa Salad


I have returned to the Blogosphere.  I hadn't meant to be gone so long.  Balance is hard and I have pushed aside some of the activities in my life I really want to be doing.  When the pace of life quickens I feel like I start cooking one tired recipe after another.  Or maybe the recipes weren't tired but I was.

Yet happy accidents happen and often out of necessity.  If balancing work, relationships, exercise and life goals is tough then cooking a meal that is healthy, quick and delicious is the same kind of juggling act.  Especially in the moments when you are standing with your arms resting on the open doors of your cabinets and looking up into the shelves for inspiration.

Wasn't I talking about happy accidents?  This was definitely one.  I am always looking for a good use for tarragon.  So I went searching through my pantry to see what I could find.  Quinoa has a naturally nutty aroma which is the perfect compliment to the anise-like flavor of tarragon.  This is a delightful side dish that would be perfect next to steamed fish or your favorite chicken dish.  It holds its own in flavor so if you tossed in chopped chicken it would make a great lunch.

Tarragon Quinoa Salad

  • 3 tablespoons of olive oil
  • one small onion chopped
  • 1 cup quinoa
  • 2 cups water or broth
  • 1/4 cup chopped pecans
  • 1/4 cup raisins
  • 2 tablespoons chopped fresh tarragon
  • 1 tablespoon white wine vinegar
  • sea salt to taste
In a 4 quart saucepan, heat olive oil over medium low heat. Add onion and saute` until soft and translucent.  Add quinoa to the pot and toss until coated with olive oil and onions are mixed in.  Pour in your water or broth.  Simmer until the liquid is absorbed and the quinoa is tender.  Just before taking the quinoa off the heat add raisins and tarragon.  The heat will plump the raisins and make the tarragon fragrant.  Toss with vinegar, sea salt and pecans before serving.

Friday, February 17, 2012

Printable Spice Labels!


These labels are 1" x 2 5/8".  So here is how you can print your spice labels below:

  1. Double click on the image below.
  2. Then right click and you should see a window of choices.
  3. Select print.
or

  1. Double click on the image below.
  2. Click on File tab
  3. Select print.

Tuesday, February 14, 2012

Aphrodisiac Hot Chocolate with Chili Pepper

Food can be sexy.  But can it be an aphrodisiac?  Maybe it is my childish love of fairy tales that had me looking up notions of foods historically thought of as aphrodisiacs.  Incidentally, there are a lot.  More than a grown woman should believe in actually.  What is interesting is that there is no flavor commonality in the various foods that have been rumored to entice, arouse or excite the opposite sex.  The reasons a particular food was thought to evoke amorous feelings were a suggestive shape (like oysters), symbols of fertility (like eggs or almonds), sensation of warmth or heat (like chili) or a belief that it had a chemical effect on the body causing arousal (wine, truffle or chocolate).

So let's talk about chocolate.  Chocolate has been a Valentine tradition since the 1800s.  I am sure much of that can be credited to marketing (Cadbery debued a heart-shaped box for Valentine's Day in 1860). Chocolate has long been connected with feelings of pleasure. In fact, chocolate is known to release small amounts of endorphins which elevate our mood.  Is this why we considerate it an aphrodisiac? Or are feelings of romance something that we create through our gestures and ideas.  Chocolate is something very special that is harvested by hand, fermented, and baked in the sun all before the long manufacturing and mixing process.  This can easily be taken for granted when we unwrap a candybar to get a sugar fix.  Whether on not you believe in aphrodisiacs, this makes it a pretty special gift even before our endorphins kick in or our face turns into that grin of chocolate melting on our tongue.


Aphrodisiac Hot Chocolate with Chili Pepper

  • 3 cups of milk (I use 2%)
  • 1 star anise
  • 1 cinnamon stick
  • 1 teaspoon vanilla
  • 2 tablespoons cocoa
  • 2 teaspoons sugar
  • 1 tablespoon semisweet chocolate chips
  • 1/4 teaspoon medium hot chili powder
In a small sauce pan or metal pot, heat milk, cinnamon stick, star anise and vanilla on medium low heat until a small amount of foam and steam form at the top. Divide the cocoa, sugar, chocolate chips and chili powder in two cups.  Add hot milk and stir.

Tuesday, February 7, 2012

Chipotle Grilled Cheese and Tomatillos

Superbowl is a special time when I get to eat what ever I want. Not too different from everyday really, except that on Superbowl Sunday, I leave aside all my fine food snobbery. That's right, Carrot Muncher, this is my bag of potato chips and I am eating the whole thing!

Nay, not really. There was a crudites platter next to the wings.  But there were definitely wings.  And did I mention these amazing spicy grilled cheese sandwiches?  I want one as I am typing this.  The first time I had one was at friends' for dinners, where she served them quartered as appetizers while she continued to cook in the kitchen.  They were decadent, slathered in butter and grilled on a buttered skillet.  I watched as she made them, but probably could have used a pen or pencil.  I will not forget however, how she piled on these ingredients. It was like the leaning tower of grilled cheese.  When she transferred it to the hot skillet I thought there was no way she could flip that.  I envisioned shredded cheese and tomatilloes all over the stove top. But no, it flipped, and it was a clean flip.  Moral is: think big, sky's the limit, and pile on that cheese.

The beauty of this event is I don't even know the first thing about football.  My place in this holy American event is to eat, make sure everyone has a seat around the TV and to keep serving the food.


Chipotle Grilled Cheese and Tomatillos
  • cilantro sprigs, about 2 to a sandwich
  • 1 small can of chipotle peppers in adobo sauce
  • butter for spreading
  • grated cheddar cheese
  • sliced tomatilloes
  • grape seed oil or other neutral flavored oil
Lightly grease a cast iron skillet with oil and turn on the heat to medium high.  Add your tomatilloes to the hot skillet and let cook a few minutes on each side.  You want a little char on each side and they will start to sweat and soften.  Butter the inside of your bread and then spread some of the sauce from the can of chipotle peppers.  When I made a lot of these sandwiches, I pureed the peppers and sauce into a paste to make use of more of it.  You can do either, but it is possible that by pureeing it the sauce will be a little spicier. Layer the tomatillo slices, cheddar cheese and cilantro.  Close your sandwich and butter the outside of the bread.  You can add it back to your hot skillet and grill a few minutes on each side.  You can also use a George Foreman grill or panini press if you have one handy and are so inclined.

Saturday, February 4, 2012

Maple Nutmeg Bundt Cake


So it is now February 4th and my New Year’s resolutions have been a bust.  I set up four different excel lists to log my progress in each area of my life I wanted to improve.  Don’t look at me with those rounded, sky-high eyebrows.  I may seem like a sort of control freak but I always think I long for routine and organization.  Alas, it doesn't take long before my routine gets stale. Which it did recently and I felt like a deflated balloon spinning backwards in circles.

Anyway, I am sorry for my brief absence from the blog world.  Believe me I couldn't have missed you more.

Sometimes a change in routine helps.  Taking some time to myself, and talking with friends allowed me to gain some perspective.  Now I am all puffed up and back on my game.  So why not reward my return to yoga class with a little cake.  Maybe I should have a recipe under my belt when I need some more of that girl talk over coffee.  And this is a great excuse to use my new bundt cake pan.

How pretty is a bundt cake pan!  They are almost architectural, like an element of a castle.  If you check out Sur le Table at Christmas they have actual castle-shaped bundt cake pans.  A little powder sugar can look like snow.  That is less work than a gingerbread house so I wouldn't feel guilty eating it.  I don't have many bundt cake recipes in my cookbook library, so I did a little internet search.  Martha Stewart's site had more than a few interesting bundt cake recipes and this one is an adaption of one found there.  You should go here.  My craving for this cake was inspired by these nutmeg maple cookies on Smitten Kitchen's blog, (hence the addition of nutmeg) which were fabulous.  Bookmark them, print the recipe for later or  add them to your list of Christmas cookies.  Definitely remember them.

My mother warned me that the cake pan needs to be greased well.  It is easy for the cake to get stuck in those pretty little grooves.  My mother-in-law, an avid baker, suggested Wilton's Cake Release.  It's a soybean oil that you can brush on the inside of your pan.  Since it is an oil it will get in all those crevices and still keep our hands clean.  Soybean oil is flavorless so you don't have to worry that you are adding anything unwanted to your recipe.

This is not a cake for sinful, gooey cravings.  This is an elegant cake best enjoyed over conversation.  It's not too sweet with just a hint of earthy spice.  I should say that I may have been a little heavy handed on the nutmeg but that is just me.  Generally in baked goods the measurement for nutmeg is 1/8th 1/4th of a teaspoon.  So here is the recipe adapted from the Martha Stewart website.

Maple Nutmeg Bundt Cake
  • 2 cups of flour
  • 2 eggs
  • 1 and 1/2 sticks of butter (or 12 tablespoons), room temperature
  • 1/2 cup maple syrup
  • 1/2 teaspoon vanilla
  • 1/2 cup dark brown sugar
  • 1/2 teaspoon baking soda
  • 1/2 teaspoon of salt
  • 2 teaspoons baking powder
  • 1/8 to 1/4 teaspoon of grated nutmeg
  • 1 cup sour cream
  • confectioners sugar for sprinkling
  • Wilton's Cake Release for drizzling
Preheat your oven to 350 degrees and as always make sure your rack is in the center.  Drizzle Wilton's Cake Release into your Bundt pan spread using a pastry brush.  You are done when it looks nice and shiny and you have greased all the crevices. Whisk together your dry ingredients: flour, baking soda, baking powder, salt, and nutmeg.  Using a stand mixer, cream your butter and sugar.  Your butter should be at room temperature in order for the sugar to properly absorb the fat.  If it is too cold you will get air pockets, melted and it will separate.  Add your eggs one at  a time and allow each one to be blended thoroughly into the mixture.  Add maple syrup and vanilla.  Add your flour in thirds, alternating with the sour cream.  Pour the batter into your pan and bake for 35 to 45 minutes.  I test it with a long wooden skewer. If it comes out dry you are done.  Sprinkle with powdered sugar before serving.  If you do it too soon the cake will absorb the sugar and you loose the pretty effect.