Saturday, November 10, 2012

Free Printable Canister Labels!


These labels are 3 1/4" x 4 ".  So here is how you can print your spice labels below:
  1. Double click on the image below.
  2. Then right click and you should see a window of choices.
  3. Select print.
or
  1. Double click on the image below.
  2. Click on File tab
  3. Select print


Thursday, November 8, 2012

Coming out of the Bubble: Green Beans and Tofu in Peanut Tamarind Sauce

So this is the week we have all been returning to work, chugging forward with alternative transportation routes.  This storm as thrown us all for a loop and not a moment goes by when I am not floating between the emotions of guilt and gratitude.  We thankfully did not lose power or suffer damage.  The worst we felt in my little hub was the powerlessness of being trapped unharmed between places of devastation.

I am sure that I don't need to tell you, but in case it is helpful, below are some links to how you can help the victims of hurricane Sandy.

www.americares.org  

If you live in NYC, check out The Kitchn blog below for updated lists of where donations of food and supplies are being collected and what is needed.


I don't want to take a single moment for granted.  For whatever it is worth I am going to continue to participate in the things I love and let this space be a record of it.  I have refreshed this blog with links to the other things that I do, love and want to share.

I have also thought to appreciate the meals we make on our weekly rotation and not just the very indulgent ones.

Now for the recipe:

It took me quite a while to figure out how to create a successful, tasty stir fry, as simple as it may be.  I would always end up with some of my vegetables very crisp and some overcooked.  My sauces never stuck.  Most recipes told me to remedy this with cornstarch, which, in the past I have tried.  Don't get me wrong, it works.  It will make a thicker sauce but I thought to experiment with some ways of thickening sauces that also added flavor dimension. Here is what I have come up with.
  1. Tamarind Paste - Tamarind is a fruit found in India, Asia, Latin America and the Middle East.  The flesh of the fruit has a sticky feel and color of a dried date, and the taste is subtly sweet and pleasantly sour.  You can get a package of tamarind paste at specialty grocers or try the Surfas Culinary District online.  Like the fruit, the tamarind paste will have seeds.  To use it in stir fry sauces I like to soak the dense fruit in a small amount of water.  The paste will dissolve into the water creating a thick, flavorful liquid.  Then you can easily separate out the seeds.
  2. Ketchup - Try it before you turn your nose up.  It not only adds thickness but just the right amount of sweetness.
  3. Peanut Butter - In my mind this is a no brainer.  Think of sesame peanut noodles or thai and vietnamese dishes that feature peanuts or peanut sauces.  I go for this one mostly for flavor but no worries here about whether it will thicken your sauces.  In fact I usually use chicken broth to keep the sauce from getting to thick.
  4. Tomato Paste - Same concept as ketchup only less sweet and more tomato flavor.


Green Beans and Tofu in Peanut Tamarind Sauce

Sauce:

  • 1 cup chicken broth
  • 2 1/2 tablespoons peanut butter
  • 2 1/2 tablespoons tamarind paste soaked in 1/2 cup of water
  • 1/4 cup of soy sauce or blend of soy and fish sauce
  • 2 to 3 tablespoons of plum or rice vinegar
  • 2 garlic cloves minced fine
  • 1 teaspoon minced ginger
  • sriracha to taste
Combine all ingredients in a small saucepan and simmer on low.  Continue to simmer on low, stirring with a spoon until the peanut butter is melted.
• I always make extra to add when serving.  It is also great on rice noodles the next day.

Vegetables:
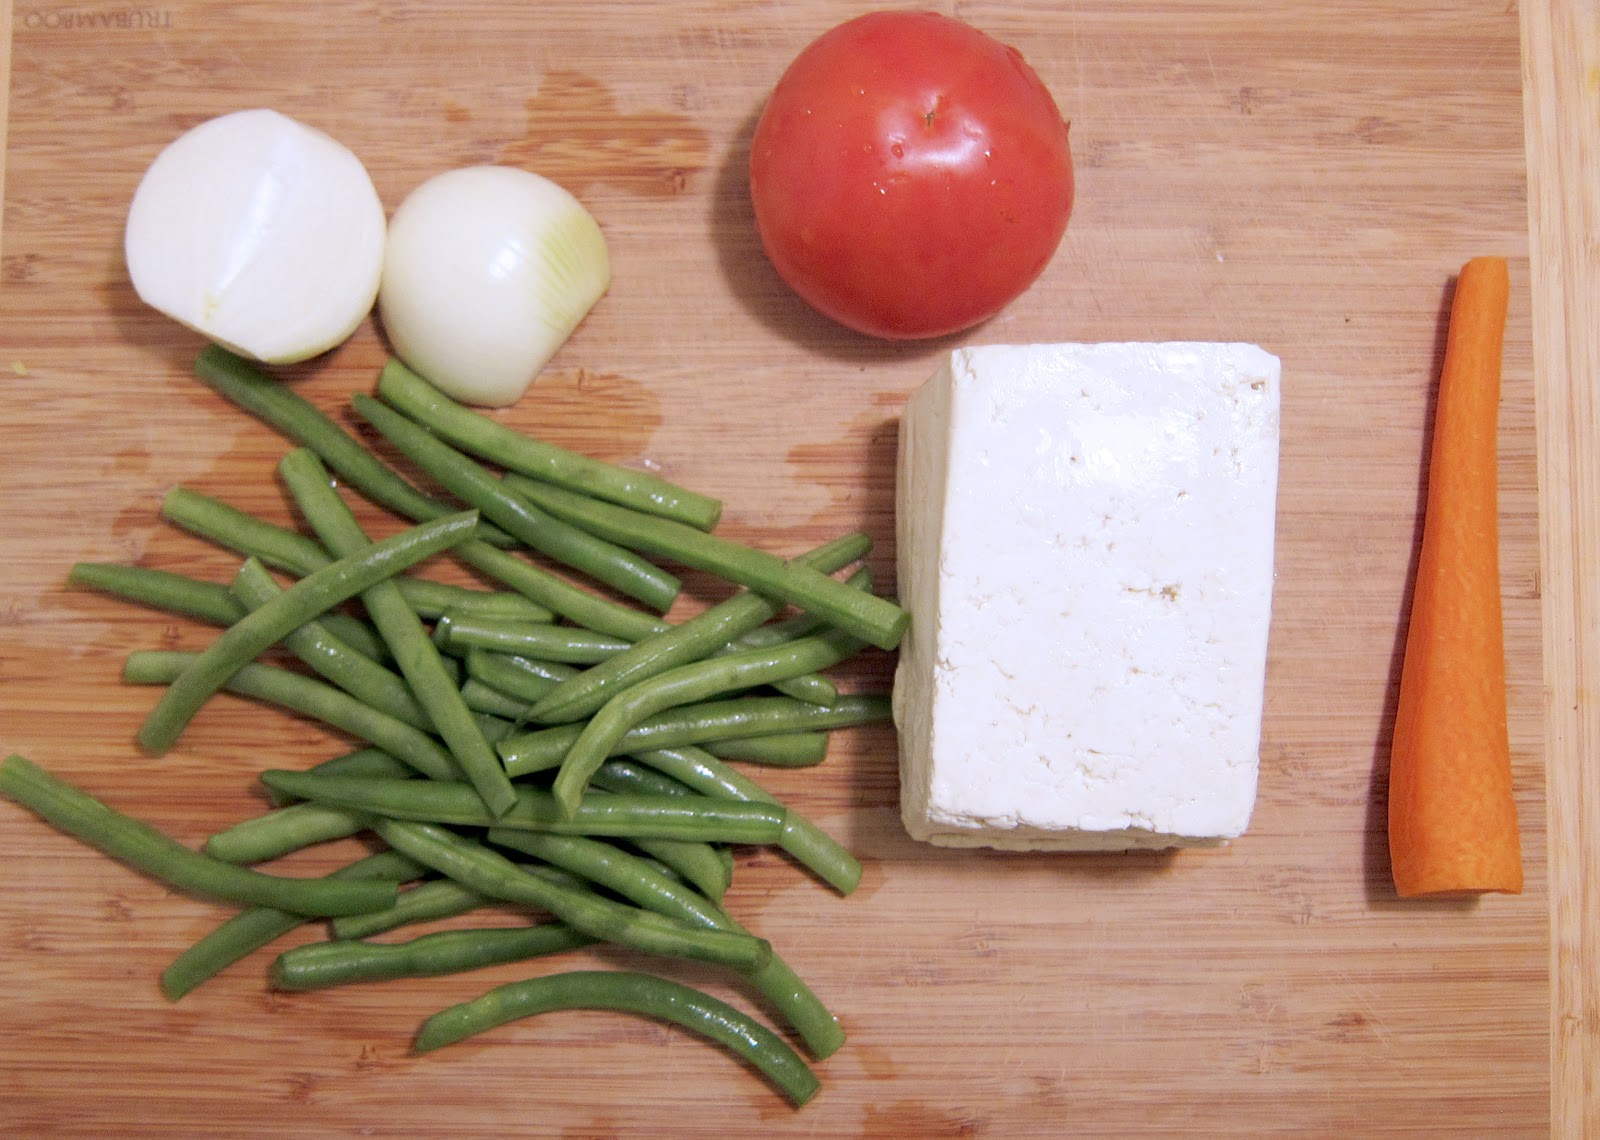
  • 1 block of tofu
  • 1 onion, chopped
  • 1 carrot, chopped
  • 1 tomato, cut in large chunks
  • 3/4 lb green beans
  • 3 tablespoons of peanut oil
Finishes (optional):
  • lime
  • cilantro
  • sesame seeds
In a large wok, heat the oil on high heat. When the wok is very hot, sautee` each vegetable separately until they wilt and soften slightly.  Stir rapidly.  Set aside in a large bowl.  Add tofu to the hot wok and stir rapidly.  Sautee` until slightly golden on all sides. Add it to the bowl with the vegetables.  Then return them all to the hot wok and add the prepared peanut tamarind sauce. Let the vegetables simmer in the sauce for about 2 to 3 minutes. Add finishing ingredients and serve over rice.


Saturday, September 8, 2012

No Knead Bread: A Step Towards Fearlessness

In my fantasies I am a fearless woman.  I don't cower from confrontation. I go para sailing and zip lining because I am not afraid of heights.

I am a pretty good cook.  It's true.  But in my fearless-woman fantasies I am exacting in my talents.  I can bake beautiful savory tarts and pastry confections.  I complete my dishes with tomato skins that look like roses, edible flowers and powdered sugar graphics.

I am thankful for my fearless-woman fantasy.  Not because I will ever be fearless.  But because I get to walk in her shadow.  I am learning to draw boundaries when pushy people push to far. I am terrified of heights but will step a little higher on a hike if I am holding my husband's hand.  And today I will bake bread.

The owner of this building said her mother used to bake bread in this kitchen.  All three generations of her family lived here together.  Her father would call his grandchildren into the kitchen with a tone of conspiracy when the dough was left to rise.  He taught them to punch the dough when grandma wasn't looking and they would watch it rise higher.  The children giggled because they thought they were being mischievous.  The grandfather laughed because he knew they weren't.

I can't give you a unique artisan bread recipe.  Nor can I give you my expertise on bread baking.  I can share with you my first time baking bread (successfully) and the recipe I used.  A loaf of round, white bread.  The kind of bread with a hearty crust to mop up the last drop of stew in your bowl.  The stuff of really good sandwiches.  The kind of bread I never knew would come out of my own oven.

If you are a follower of the New York Times, Dining and Wine section you may have already tried this recipe.  In fact, I hope you have. Mark Bittman released it in 2006 and you should click here to get it:

No Knead Bread 


Sunday, August 26, 2012

Nostalgia at Bull on the Beach in Ocean City, MD

My dad ate Richie Sambora's lunch.

I should preface this story by saying that between the ages of eleven and thirteen I was the kind of teenage Bon Jovi fan that would have made the band cower and run Godzilla-movie style.  By thirteen I had covered over all of the pretty pink poppy wallpaper in my bedroom with glossy magazine pictures of frizzy-haired men sporting vests and swinging guitars.  I teased my hair.  I collected buttons with the band members faces on them and I wore them...ALL...on the front of my denim jean jacket.

Around that same time I remember taking the ferry via Cape May down to Ocean City, Maryland with my parents, brother, aunt, uncle and cousins.  Midday, we wandered around the boat in search of some lunch and stumbled upon something like a cafeteria.  At least that is what my grown up self imagines, but at the time there was confusion among the adults as to the system of this on-board eating establishment.  Do we order and take a ticket? Do we pay first? Or do we just choose from what is available on this counter and assume that we pay afterwards?  We chose option number three.

As six of us begin to chow down on chicken Caesar wraps, there are four figures that are walking towards us, seemingly in slow motion.  Two are wearing black T-shirts with the word crew written in large, white, block lettering.  The other two are Richie Sambora (guitarist from Bon Jovi) and Tico Torres (drummer from Bon Jovi).  I can still see the weight of their hair feathering out as they walked. 

"Excuse me, Sir, but you are eating our lunch."

Worse still I heard my own small and squeaky voice.  "Aren't you Richie Sambora?"  Did I have to ask?  His face was pinned to my jacket.  

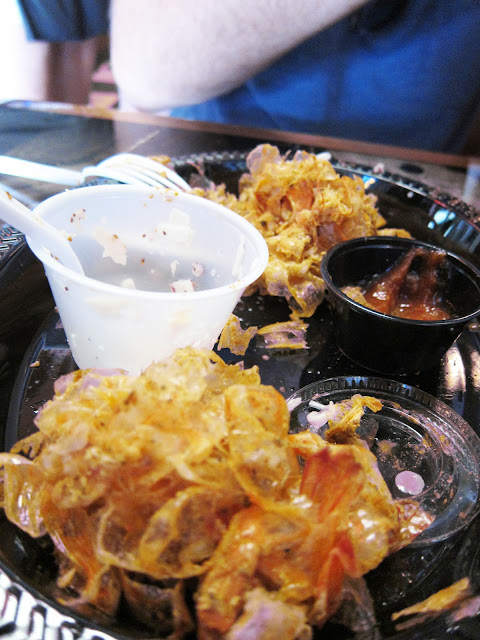
Vacations growing up were all about visiting relatives which meant that food was at the center.  Dinners were cooked at someones home and lunch was when we were free to roam the boardwalk.  At the time the selection was not as it is today.  Guido's Burritos and Hammerheads have stepped it up by offering boardwalk food appealing to the same crowd but with better ingredients (and thankfully not fried or on stick).  But before these, Bull on the Beach has always been tried and true.  A favorite of my Dad and uncle, it wouldn't have been and OC vacation if we hadn't made it there for lunch.

If they have changed there menu over the years I wouldn't know it.  I have consistently ordered the roast beef or heaping half pound of steamed shrimp.  All of my sensory memories of my summer beach vacation can be summed up on one of their Formica benches.  We always squeezed four or six to a booth in our shorts and bathing suits, salt still clinging to our hair and skin.  I would burn my fingers trying to peel the too hot shrimp and my lips would begin to pucker and wrinkle from the Old Bay seasoning.  The roast beef is so tender and fluffy that it needs no sauce, just a heaping pile of fiery horseradish. This place had set the bar of what a traditional coleslaw should be.  The contents of those little plastic cups are perfectly balanced with not too much sugar or mayonnaise, but instead a hint of black pepper.  A refreshing compliment to the meal.

I am sure if you have been to the boardwalk in Ocean City, Maryland you have already been to Bull on the Beach, so let's just call this a nostalgic appreciation post.  If you haven't and you are heading down for Labor Day weekend, you should make this one of your top three lunch spots (check out Guido's Burritos and Hammerheads too).






Friday, July 13, 2012

Orange Rosemary Infused Vinegar


This is more beautiful in person.  If I were a better photographer I could show you the confetti flecks of light on the table, how the rosemary presses up against the glass, floating orange zest like a golden, botanical snow globe and flecks of red chili peppers peeking out in between.

The real inspiration for infusing vinegar was this bottle.  We saw it, we wanted it and we needed an excuse to have it.  There is an unspoken rule in our New York apartment that if it doesn't have a function we don't need it.  Frankly because it probably doesn't fit.  But there it was refracting the summer sun onto the tag sale table on the side of the road in rural Pennsylvania.  So we took it home as memory of a lovely out-of-the-city weekend and found a way to put it to good use.

You don't need a beautiful bottle for this but it helps.  This isn't quite a recipe.  You want to heat up your  vinegar so that it is warm but does not boil.  Then pour it over your aromatics.  I used 2 garlic cloves, the zest of one orange, a sprig of rosemary and 2 tian jen chilis.

I would love to hear some of your ideas for infused vinegar...


Tuesday, June 26, 2012

How to Make an Extraordinary Salad

Tell me if this sounds familiar.  It is 1:00 in the afternoon, time to stop for lunch and you open your desk drawer to find the same tired menus.  Same options as yesterday: sandwiches that are more meat than bread, oily pizzas, cheese steaks and pastrami sandwiches all made on the same flat top grill with crusty brown bits.  The same places that offer the before mentioned will also offer a salad option and your thinking, 'It would be great to have something healthy and light." So you order the salad and what do you get?  A ridiculous amount of iceberg lettuce topped with processed cheese cubes, deli meat, a dried out hard boiled egg, and maybe, just maybe a whole, pitted, black olive that came out of a can.  Let's not forget the little cup of thick, viscous salad dressing most likely originating from a bottle marked Kraft.

Now tell me, was it worth it?  Do you feel healthier?  In fact, I always marvel at how I feel worse after eating one of those salads than I would if I had had the cheese steak.  Who am I kidding?  I did have the cheese steak.  Do you know why?  Because I was secretly convinced that I do not like salad.  Secretly, because I a a huge proponent of healthy eating.

So where did salad go wrong for me?  I think it started in high school, when salad was for girls who were watching their figures.  I hated those girls.  If I was going to eat a hamburger I wasn't going to apologize for it because I was a girl.  Worse than that it meant that salad was not about the pleasure of eating, it was about restricting that pleasure.

So I would like to change how I feel about salad.  I have been hard at work exploring what a salad can offer and learned that an extraordinary salad is not only worth eating, but that which I will look forward to eating.  In fact, I will crave it.  That being said, there are a few things that need to understood as components of an extraordinary salad.

Components of an Extraodinarily Good Salad:
  1. Contrasting textures: crunchy/creamy or soft - For example, crunchy greens or carrots with soft cheese or avocado
  2. Contrasting flavors: salty/ sweet, crispy/meaty - For example, dried fruit and nuts, or chicken and crunchy croutons
  3. Bright colors: Velieve me if your salad is dark brown and wilted green you are not excited about eating it
  4. You must have a salad spinner.  If this is an obvious fact, you are a cut above the rest of us.  If you are like me you may have thought that paper towels were a good enough drying method. They are not.  They are a hassle and never seem to get the leaves dry enough.  Spin out as much water as possible because a little will ruin you salad.
  5. Whatever greens you are using, if the leaves are large, cut them down the center vein first and then chop into bite size pieces.  That way you can get more flavors in one bite.
  6. No deli meat, no canned vegetables, no processed cheeses and for the love of Pete, no bottled salad dressing.  
Here are some other extroadinarily good salads that you really should try. Click on the link to go to these amazing sites.

  1. Cobb Salad from Smitten Kitchen
  2. Kale Market Salad from 101 Cookbooks
  3. Mark Bittman's Raw Beet Salad
  4. Cucumber Peanut and Basil Salad from Fine Cooking
  5. Raw Asparagus and Mushroom with Walnuts and Miso Dressing from Gourmande in the Kitchen
  6. Wedge Salad from No Recipes
This salad was inspired by one we had at a wedding this past weekend.  The avocados were perfectly ripe and coated the crisp romaine like a dressing.  It had a hint of lime and garlic.


Spicy Lime Chicken and Avocado Salad 

  • 1 head of  romaine lettuce 
  • 2 avocados cubed
  • 1 whole chicken breast, 4 cutlets or 4 to 6 tenderloins 
  • 14 cup of olive oil plus a little more for drizzling
  • 1/4 to 1/2 cup water, chicken broth or wine
  • 1 clove of garlic
  • half a shallot
  • juice from 1 and a half limes
  • 1/2 a teaspoon of turkish red pepper
  • 1/4 cup sunflower seeds
  • salt
  • black pepper or lemon pepper
Soak the romaine leaves in a a sink full of cold water or an extra large bowl.  Cut each leaf vertically along the vein, chop horizontally into bite size pieces, and add to the salad spinner.  Spin until dry.  Toss with cubed avocado and sunflower seeds.  Mince the garlic and shallot.  Add to a small bowl with lime juice.  Add salt to taste and red pepper.  Stir with a fork and add the olive oil in a slow steady stream.   Chop the uncooked chicken into bite size pieces or small cubes.  Toss in a small bowl with a drizzle olive oil, salt, pepper and 3 tablespoons of dressing with garlic and shallot.  Add hot skillet and stir.  When the chicken starts to stick add your choice of cooking liquid (water, stock or wine). toss chicken and dressing to taste with romaine and avocado.

Thursday, May 31, 2012

Printable Weekly Menu Planner for Spring!


So here is how you can print your weekly meal planner below:
  1. Double click on the image below.
  2. Then right click and you should see a window of choices.
  3. Select print.
or
  1. Double click on the image below.
  2. Click on File tab
  3. Select print.

Tuesday, May 29, 2012

Artichoke Hearts with Bottarga

"So you made pizza with zucchini and what?" This is what I asked my brother when he told me to check  out his pizza on My Monday Pie.  Zucchini and bottarga.  "What's bottarga again?  A new and trendy, terrain-specific vegetable like say ramps?" Nope. Cured mullet roe.

I have since sampled this pie and it was very good.  It left me bottarga intrigued.  What else can I pair it with?  Where can I get it?  And why have I gone so long without it?  

Then one lazy evening I am watching Anthony Bourdain on No Reservations on Netflix and he is traveling in Sardinia.  His beautiful wife is describing the dynamic flavor combination of artichokes and bottarga in her lovely Italian accent. The next thing I know I am surfing the internet, planning my next shopping trip around where I can get bottarga.

As mentioned, bottarga is the roe removed from the inside of a fish, in this case mullet, though sometimes tuna, cured, dried and grated over a dish for flavor much like you would Parmesan.  Also like Parmesan, you can buy it whole and grate it yourself right before serving or buy it already grated. 

I may have mentioned this before but Buon'Italia is my go-to Italian market of choice in NYC.  I love  Chelsea Market and this is a wonderful time of year to walk the High Line.   There is always the famous Eataly but Buon'Italia is less of a circus show and more reasonably priced.  And have I mentioned the High Line?  

I may have gotten carried away here with the pictures, but artichokes are beautiful and so is Manhattan.


Artichoke Hearts with Bottarga

  • 6 artichokes
  • 1 lemon
  • 3 tablespoons olive oil
  • sea salt
  • 1 tablespoon of grated bottarga
  • chopped fresh parsley
  • butter
To trim your artichokes, remove the outer leaves until they start to become yellow and tender.  The heart will be cone-shaped.  Cut the hearts in halves or quarters.  Preheat the oven to 325 degrees.   In an oven-proof baking dish, toss with the artichoke hearts with the olive oil and parsley.   Add a few teaspoons of water to the bottom of the baking dish.  Grease a piece of parchment paper with butter and   place butter side down over the artichokes.  Bake for 20 minutes.  Toss with freshly squeezed lemon, sea salt and grated bottarga.

    Friday, May 25, 2012

    Homemade Mascarpone

    I know the kind of posts I should be writing.  Spring vegetables.  Memorial day grilling recipes.  You know, something seasonally appropriate.  I am not always so timely with my discoveries of regular with my writing routine.  This blog is my foodie journal writing and I suppose this is just where I find myself today, making cheese.

    I am not sure why I want make cheese.  It isn't because it is difficult for me to acquire great artisanal cheeses of every variety.....from anywhere......in New York.  I think it is the beautiful science of it.  The slow thickening of liquid to cream or curd.  I like the slow ceremony of it: sterilizing, setting up the equipment, the quiet waiting and watching.  It forces me to slow down and stay in a moment.  Then the reward, a lighter, brighter milk and tang taste, with every bite a reminder of where cheese actually comes from.

    I am starting small here.  Mascarpone is a mild, soft cheese and requires no major investments from a cheese making supply company. Although, butter muslin is not a bad idea since you may loose too much of this cheese through regular cheese cloth.  If you haven't had it, mascarpone is not unlike cream cheese.


    This recipe is from Artisan Cheese Making at Home by Mary Karlin.  If you are thinking it might be nice to make cheese at home than you should definitely start with this book.  Karlin does such a wonderful job with breaking down types of cheeses, equipment you will need, vocabulary and where to get cheese-making supplies that, if you were ever intimidated, you will feel confident in trying these out at home.

    • 1 lemon
    • 2 cups of heavy cream
    • 1/3 cup evaporated dry milk
    Mary Karlin stresses that you have your equipment sterilized before hand.  A good sanitizing solution is 4 liters of water to 1 tablespoon of bleach.  Also, that your whisk and spoon are a non-reactive metal.  Below is a list of the kitchen gear you will need.
    • 4 quart metal saucepan
    • heatproof glass bowl that will sit over the sauce pan
    • butter muslin or multiple layers of cheesecloth
    • wire whisk
    • metal spoon
    • kitchen thermometer
    Whisk together the cream and evaporated milk in the glass bowl.  Add about 2 inches of water to the bottom of the saucepan and set the bowl on top. Turn the heat on medium low and switch to a metal spoon.  The stirring is important because the cream forms a skin.  The idea is that you want the temperature of the cream to rise slowly until it reaches 180 degrees F.  It should take 40 minutes, give or take a few. Once it reaches 180 degrees, remove from the heat.  Slowly squeeze in juice from the lemon while stirring, one half at a time.  Refrigerate eight hours or overnight.  Strain your cheese in a colander through butter muslin (or about 5 layers of cheese cloth) to remove any excess moisture.  The mascarpone is now ready to eat.  It will last for about 2 days.

    Tuesday, May 15, 2012

    Sipping Once, Sipping Twice, Sipping Chicken Soup with Rice

    Maurice Sendak, you will be missed.  You understood so well the loneliness children feel with their inability to articulate their feelings.  You understood that childhood is not all sweetness and innocence but also the first phase of struggles to overcome. There is still a copy of "Where the Wild Things Are" in my night stand to remind me that even in my most frustrating moments, I can always sail home.  Thank you for giving our young selves the words and illustrations we needed.  Thank you for not underestimating our feelings.

    I felt a great sense of relief when after Max had decided to return from his great and perilous adventure, after he left his new and terrible friends, that here was a bowl of something steaming and delicious brought to his room.  I could just taste it.

    On snow days and sick days my mom would read "Chicken Soup with Rice" from the Nutshell Library to remind us of the comforts of home when storm or flu kept us indoors.  I am home sick today and thinking of Old Bombay, my favorite line in the poem when the young illustrated Maurice imagines traveling to exotic lands to "dream about hot soup all day."

    I declared that I would ride an elephant in Old Bombay, to which my dismayed mother would always reply, "Oh no, please don't go, I'll eat you up, I love you so."


    This is a take on both a traditional chicken soup with rice recipe and an Italian creamed soup with chickpea, porcini and farro.  I added the elements of that soup while swapping the farro out for black wild rice.   Both exotic and familiar.


    Creamy Chicken Soup with Wild Rice, Mushrooms and Chickpeas

    For the stock:
    • 1 lb chicken parts
    • 2 small or 1 large onion
    • 2 stalks of celery 
    • 2 garlic cloves smashed to removet he skin but other wise kept whole
    • 2 carrots
    • 2 small or one large bay leaf
    • 7 to 9 sprigs parsley
    • 7 to 9 sprigs dill
    • 1 teaspoon peppercorns
    • 1 teaspoon juniper berries
    • 10 cups water
    • salt to taste
    For the soup:
    • 6 cups above chicken stock
    • shredded cooked chicken from above stock
    • 1/2 cup dried porcini mushrooms
    • 10 oz to 1 lb chopped mushrooms such as crimini, portabello, standard white button, oyster or a mix of these
    • 2 cups cooked wild rice
    • 1/4 cup heavy cream
    • 3 cups chickpeas pureed or mashed into a paste
    • 1 chopped onion
    • 1 stalk of celery chopped fine 
    • 2 garlic cloves sliced
    • 1 carrot chopped fine
    • 1 bay leaf
    • fresh chopped parsley for serving
    • fresh chopped dill for serving
    • 3 tablespoons olive oil
    • sea salt  and white pepper to taste

    Put the dried porcini in a small bowl of water. 

    In a large stock pot, combine all the ingredients for you chicken stock.   Cover and and bring to a boil.  Once it is boiling, lower the heat to medium and simmer until the liquid reduces by one fourth.  Remove the chicken and set aside to cool.  Put a colander over a large bowl and strain the broth.  Discard remaining ingredients.
    In a dutch oven, heat the olive oil.  Add your chopped onion, carrot, celery and garlic.  Sautee` until they soften.  Add mushrooms and continue to sautee until the mushrooms reduce in size. When the vegetables start to get dry, add the cream.  When the cream is absorbed by the mushrooms, add the stock and the bay leaf.  Simmer over medium low heat and reduce to desired thickness.  When the chicken is cool separate the meat from the bone and chop to shreds.  Add your cooked rice, shredded chicken and salt and pepper to taste.  Serve with chopped fresh herbs.

    Wednesday, May 9, 2012

    A Fresh Look for Kitchen Chairs

    I love my kitchen.  I don't mean I love kitchens.  I do, of course but that is not what I mean to say here.  I mean I love my kitchen.  After 15 years of living in Brooklyn I have been blessed with a dream kitchen.  It is spacious enough for a dining table and over looks the building's flower garden.  All of you jealous city dwellers feel comforted by the fact that I was once in your shoes.  In most of my Brooklyn kitchens I had to lean against the wall in order to open the refrigerator door.  Thanks to a generous stroke of good luck (proceeded by a few strokes of bad luck, which is a story we will save for another day) we are able to enjoy a well lighted, well cared for and spacious kitchen.  I will say that I did the same kind of cooking in my tiny kitchens as I do in this one and never shied away from dinner guests or parties.  It is possible, it just poses different organizational challenges. 

    As a textile designer this is my favorite time of year.  At work we are scoping out new trends in colors patterns and fabric construction.  Spending a day in the fabric district, shopping and learning about new fabric styles and techniques feels a lot like when my Uncle Nino gave us free reign in his pastry shop. I can't help but bring a little of what I see home.  

    I like updating the look of my kitchen with a rotation of textiles.  This works well particularly since our kitchen is mostly white and neutral.  Reupholstering these chairs has been on my project list for a while.     I found this fabric at Mood Fabrics.  If you haven't heard of Mood, it is an overwhelming 3 floors of gorgeous fabrics and popular among designers and trendy design students (largely form FIT).  So for this project, let me narrow it down for you, head downstairs. For a richer look, go with a fabric that is woven vs. printed. The printed fabrics at Mood are beautiful but on furniture the woven will give a more upscale look.  I like take to take a bunch of swatches to see what works best in my home.  

    I haven't reupholstered chairs before but it was surprisingly easy.  If you are thinking of recovering your own chairs you will need the following supplies:
    • one pair of good quality fabric scissors
    • measuring tape
    • a staple gun with extra staples
    • 1 and 1/2 yards of fabric for 4 chairs
    • 1 fabric crayon
    1. Flip over your chairs and find how the seat is attached to frame.  For these chairs there were 3 simple screws that were easy to remove and put back.  I would recommend doing one chair first before taking the seats off of the other chairs so that you are comfortable with the process before you continue.  It is easier to fix a mistake once than four times.
    2. Measure how much fabric you will need to cover the seat of the chair.  Make sure you leave enough room to staple the fabric on the back.
    3. Staple the fabric to the back of the chair.  Staple once on each side of the seat directly across from the last staple.  Continue stapling in this order.  When you get to the corners, create a neat fold in the fabric and then staple. Make sure all of your folds are consistent and facing the same way.
    4. Reattach the seats to the frame.

    Before
    After


    Sunday, April 29, 2012

    Dinner on the Fly: Skate and Radishes in Anchovy Brown Butter and Olive Oil Mashed Potatoes and Dandelion Greens

    In the spirit of Spring let me post this dish.  Walking around Essex market I was stopped by some dandelion greens.  There is only one time of year when you see them.  Unlike asparagus which you can get all year round but probably shouldn't, dandelion greens are only seen in certain markets in Spring.  They are a earthy and very bitter green.  I highly recommend this recipe for Ligurian mashed potatoes and dandelion greens by Mark Bittman.  It's a great recipe to use with any spring green actually and simple enough for a busy week night.   Remember that there are only four ingredients so make them count.  Use very good olive oil, sea salt and a flavorful potato.  Otherwise the subtleties in this dish can be lost. A good note for any dish that has very few ingredients.  

    Radishes sauteed in brown butter is a favorite side dish of mine in Spring.  (See this earlier post.)  I recently made some anchovy butter and my sauteed radishes got a little update.   It was like falling in love all over again.  


     Skate and Radishes Sauteed in Anchovy Butter

    • 1 skate wing (should be enough for 2 people)
    • one large radish or 1 bunch small radishes
    • 3 tablespoons butter
    • 1 teaspoon anchovy paste
    • salt and pepper to taste (remember that the anchovy is also salty)
    • parchment paper
    Preheat your oven to 400 degrees.  Cover a baking sheet with parchment paper.  Melt butter with anchovy paste in a medium skillet until golden brown.  Lay the skate wing onto parchment paper.  Drizzle a small amount of the butter onto the skate.  Fold the sides of the parchment paper in two or three times to seal, cover, and to make an envelope for the fish.  Bake in the oven for 15 to 20 minutes.

    Sautee` your sliced radishes in the remaining butter.  Turn the heat down to medium low and cook until tender.  Serve over skate.  To remove the fish from the bone, slide a fork or knife down the contour of the bone on either side and the meat will come off in strips.